'/%3e%3cpath%20id='cross_2'%20data-name='cross%202'%20class='cls-2'%20d='M20.612,30.43h0a5.361,5.361,0,1,0-10.723,0H0A33.709,33.709,0,0,1,30.569,0V9.75a5.361,5.361,0,1,1,0,10.723V30.43Z'%20transform='translate(67.193%200.007)%20rotate(90)'/%3e%3cpath%20id='cross_3'%20data-name='cross%203'%20class='cls-3'%20d='M20.612,30.43h0a5.361,5.361,0,1,0-10.723,0H0A33.709,33.709,0,0,1,30.569,0V9.75a5.361,5.361,0,1,1,0,10.723V30.43Z'%20transform='translate(67.186%2067.041)%20rotate(180)'/%3e%3cpath%20id='cross_4'%20data-name='cross%204'%20class='cls-4'%20d='M20.6,30.5h0a5.361,5.361,0,1,0-10.723,0H0A33.71,33.71,0,0,1,30.56,0V9.818a5.361,5.361,0,1,1,0,10.723V30.5Z'%20transform='translate(0%2067.041)%20rotate(-90)'/%3e%3c/svg%3e)
Using a Folder as a Board
When you change the view mode of a team folder to a board, the Markdown documents and images in the folder are shown as posts instead of a file list. You can run a space for exchanging posts, such as notices, team news, or an open discussion board, with a single folder and no separate tool. This document explains how to switch a folder to a board and how to publish and view posts.
Before you begin
- Posts are the
.mdfiles and image files in the folder. The files stay as they are when you switch to a board, and you can return to the file list view at any time. - To change a folder to a board, you must be an administrator or the person who created the folder.
Create a board folder directly
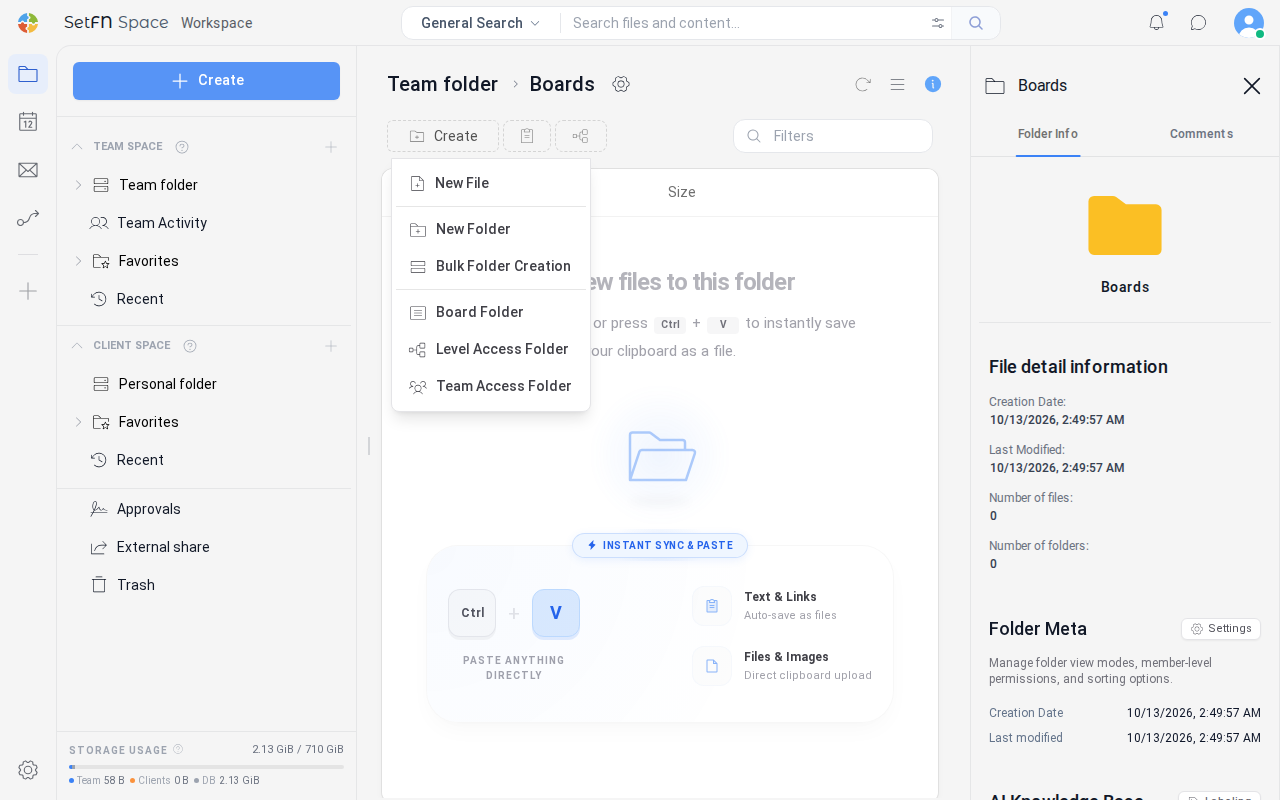
To create a folder for use as a board from the start, use Board Folder in the Create menu. You do not need to change the view mode separately after creating the folder.
- Go to the location where you want to create the board.
- Select
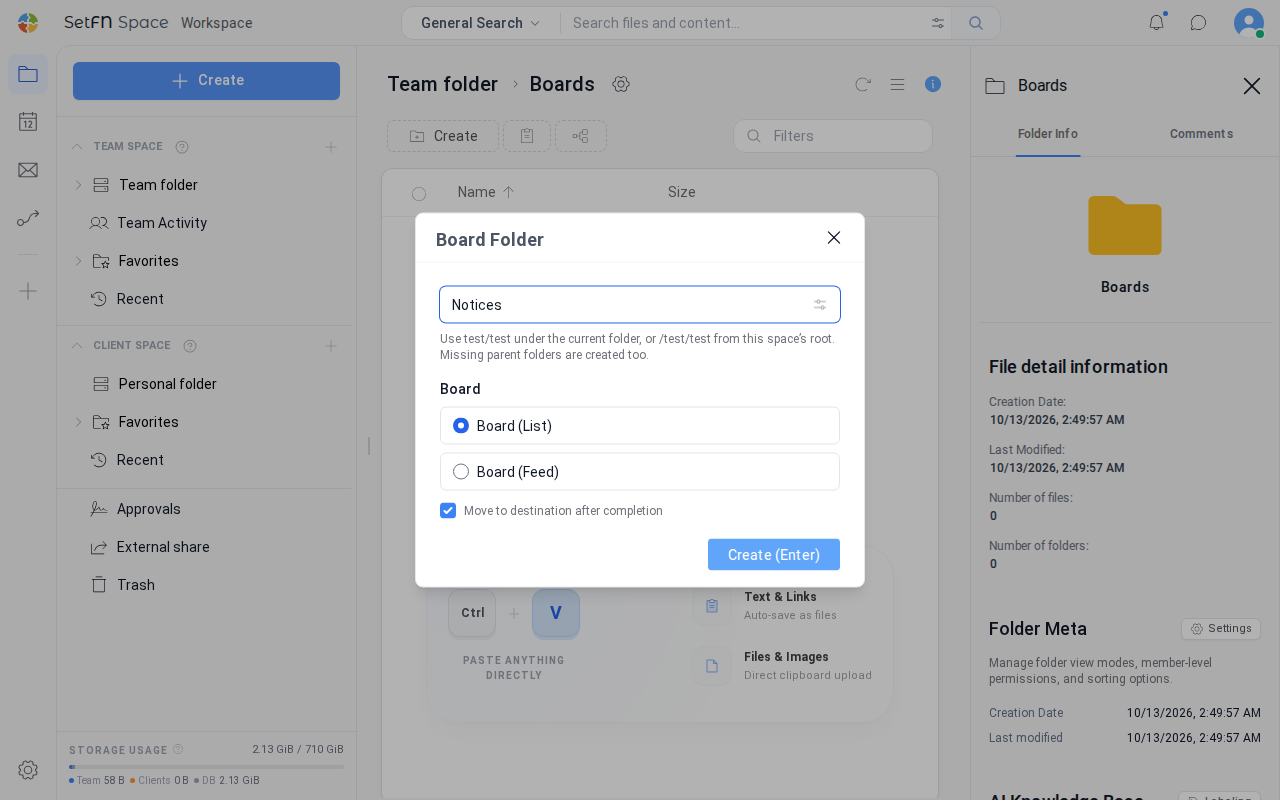
Createabove the folder list, then selectBoard Folder. TheCreatemenu in the left sidebar does not includeBoard Folder, so you must useCreateabove the folder list. - Enter a folder name, select a board type, and then select
Create.
| Item | Description |
|---|---|
| Folder name | Enter the name of the board to create. Select the icon on the right of the input box to fill in the name with a date, a project name, or a timestamp. |
| Board | Select Board (List) (default) or Board (Feed). The gallery type is not available in this window, so if you need it, change it in File view options after creating the folder. |
| Move to destination after completion | On by default. When it is on, you move to the new board right after the folder is created. |
When the folder is created, a board screen with no posts opens. The New Post and Paste buttons appear at the top, and sorting is set to Created and Descending. You can change the view mode and sorting at any time in File view options of the created board.
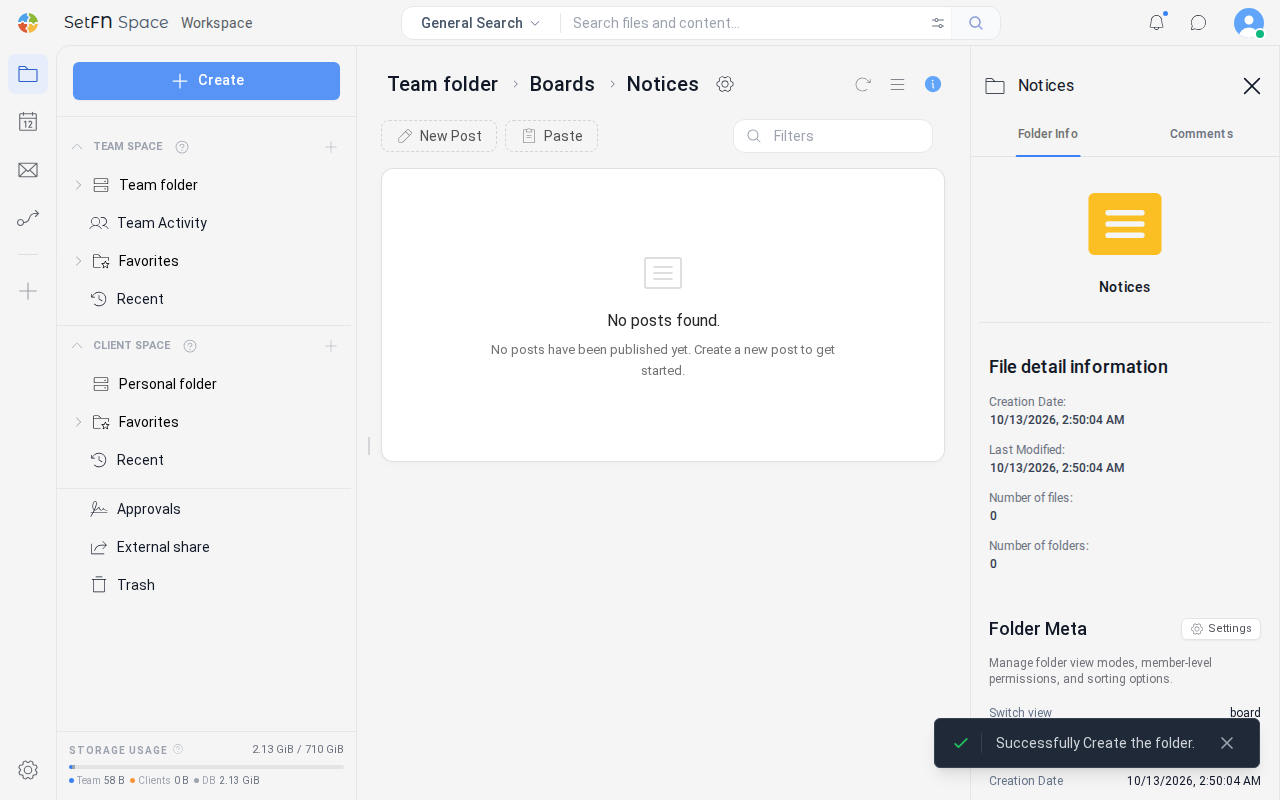
The folder is created with the board view and file rules applied. You can check and change the file rules in Setting File Rules.
Change an existing folder to a board
- In the folder you want to use as a board, select the gear icon (
File view options) next to the folder name. - Select the
Boardbutton at the top right of theView Optionstab. You can also selectBoard (List),Board (Feed), orBoard (Gallery)directly from the dropdown. - Select
Update.
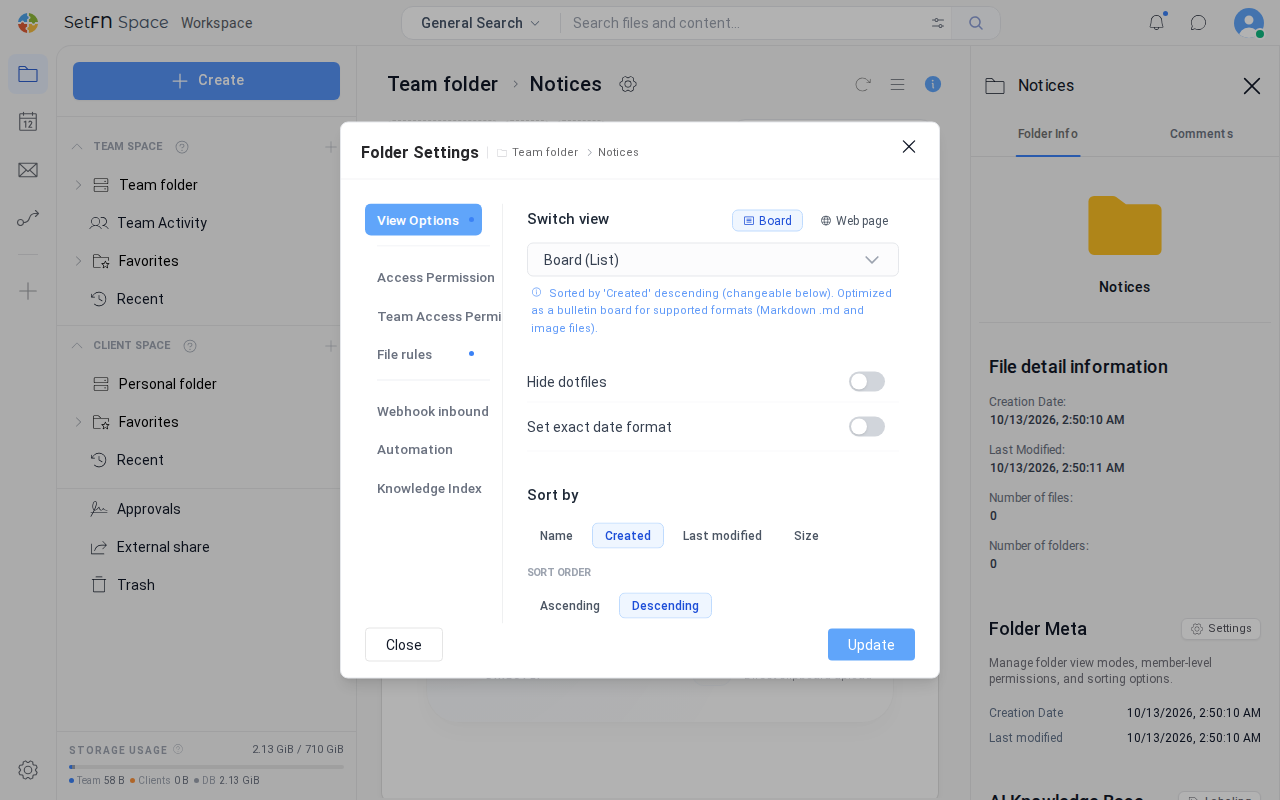
Selecting the Board button also changes the following settings.
| Setting | New value |
|---|---|
| View mode | Board (List) |
| Sorting | Created and Descending (the newest posts are shown at the top) |
| Allowed extensions | Only when the list is empty, it is filled with .md, .markdown, and the image extensions (.jpg, .jpeg, .png, .gif, .webp, .svg, .bmp, .ico, .tiff, .heic). |
| Only authors can edit or delete | On |
You can check and change the allowed extensions and Only authors can edit or delete on the File rules tab. For details, see Setting File Rules.
Select a board type
| Type | Description |
|---|---|
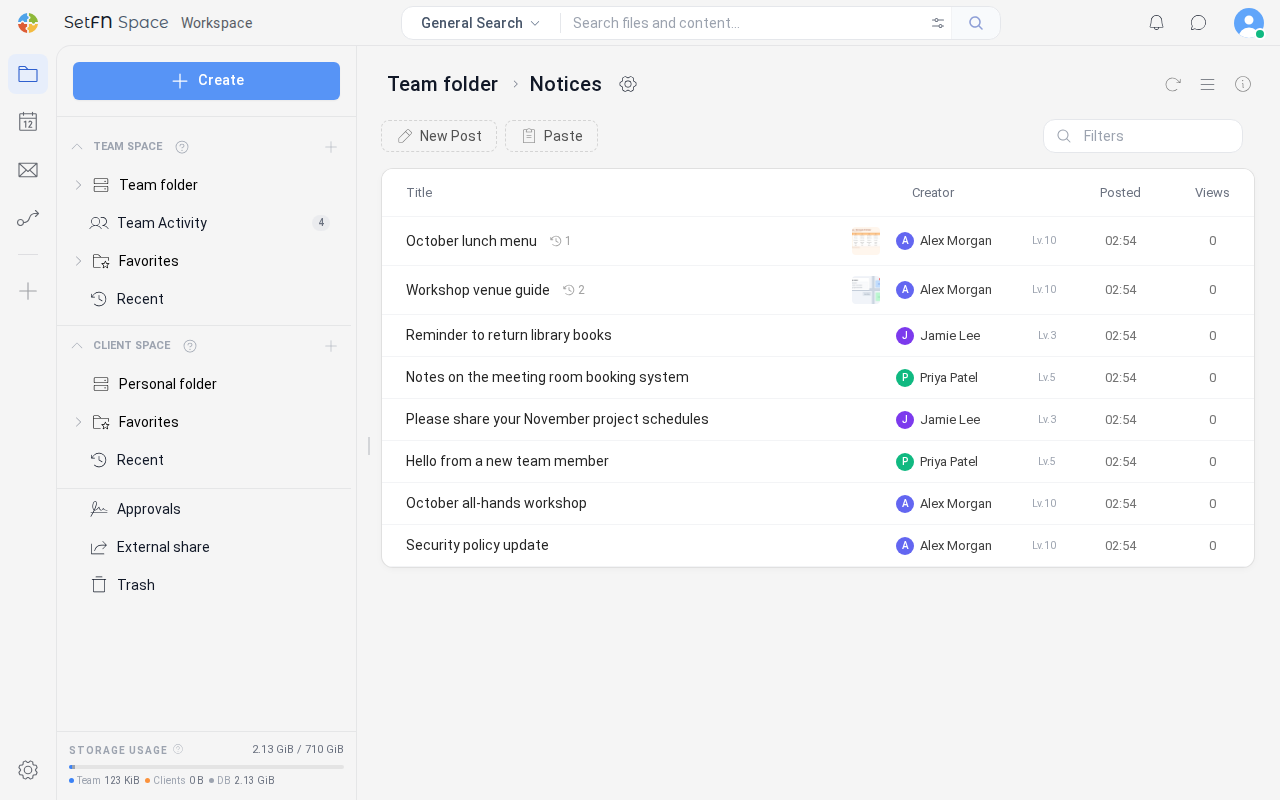
| List | Shows the title, author, posted date, and view count in a table. The comment count, edit count, and thumbnails of attached images are shown next to the title. Suited to boards with many posts, such as notices. |
| Feed | Shows the author, title, body preview, reactions, and comments as cards. Suited to boards where the body is read right away, such as team news. |
| Gallery | Arranges cards in a grid. Each card shows the title and the beginning of the body, and image posts use the image as the cover. Files for which a preview cannot be created show their extension. The view count is shown only in the list type. |
- List
- Feed
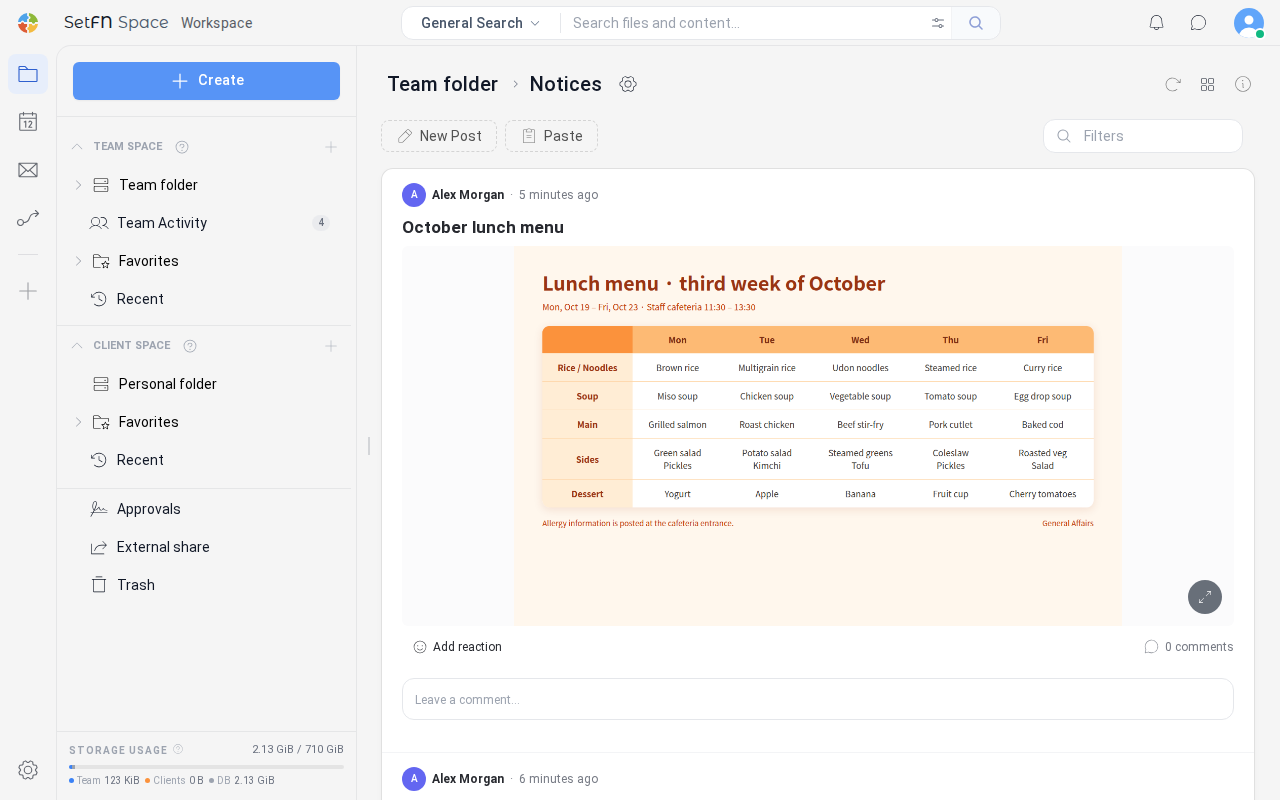
- Gallery
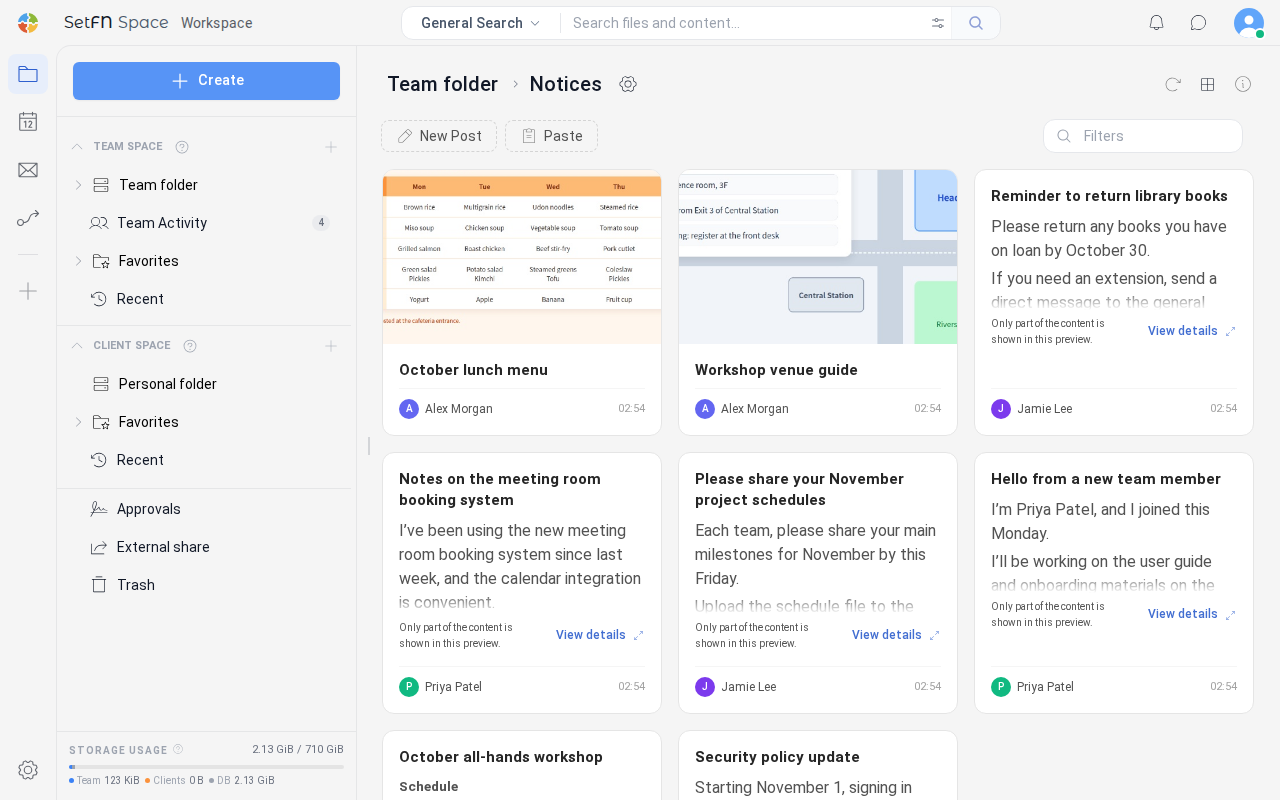
The sort settings are kept when you switch between board types.
Publish a post
Write a new post
- Select
New Postat the top of the board. - Enter a title and body in the compose window. Write the body in the Markdown editor.
- Select
Publish.
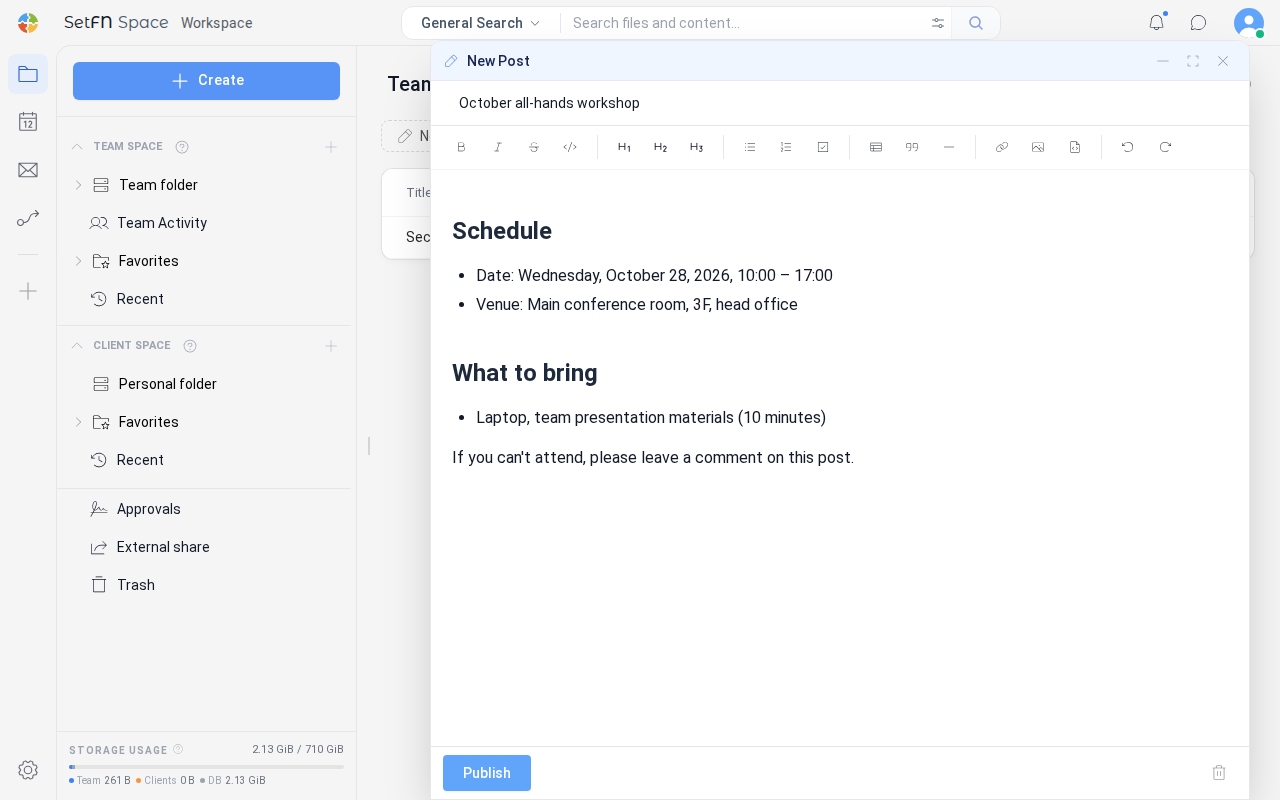
When you publish, a .md file named after the title is saved in the folder and the message Post published successfully. appears. If the title is empty, Please enter a title. appears. If a post with the same title already exists, a window asks whether to overwrite it. Characters that cannot be used in file names (\ / : * ? " < > |) are replaced with _.
Publish by pasting
Paste: Converts the content copied to the clipboard into Markdown and puts it in the compose window. Formatting copied from a web page or document is converted to Markdown formatting, code to a code block, and table data (CSV or TSV) to a table. If the first line is in the# Titleform or is shorter than 50 characters, it is suggested as the title. The post is published only after you check the content and selectPublish.- You can also press
Ctrl+Vor drag and drop files on the board screen. Files and images are uploaded as they are. If you drop a single image, it is published as an image post after you enter a title. Text goes into the compose window.
View a post
Select a title in the list to open the post details inside the board. Because ?post=filename is added to the address, the browser's back navigation works, and you can copy the address to share it with others. Select the Back button at the top left to return to the list. Select the body on the details screen to open it in the file viewer.
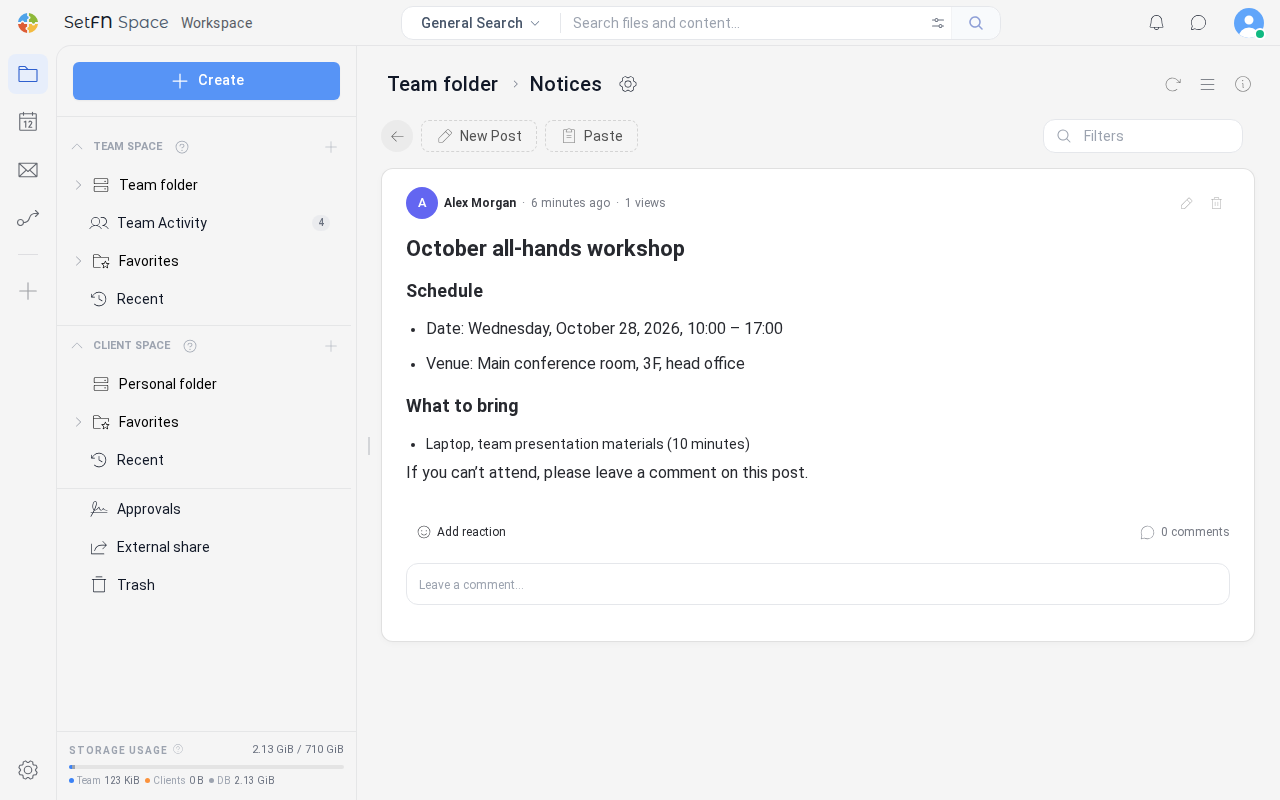
| Indicator | Description |
|---|---|
| Views | Increases by 1 each time the post details are opened. If the same user opens the same post again within 30 minutes, it is not counted. Opening the post in the file viewer also counts toward the view count. |
| Speech bubble icon and number | The number of comments. Select it to open the comments tab. |
| Clock icon and number | The number of edits. Select it to open the change log tab. |
The comment count and edit count are not shown when they are 0.
Use the author menu
Select an author's name in the list to open the author menu.
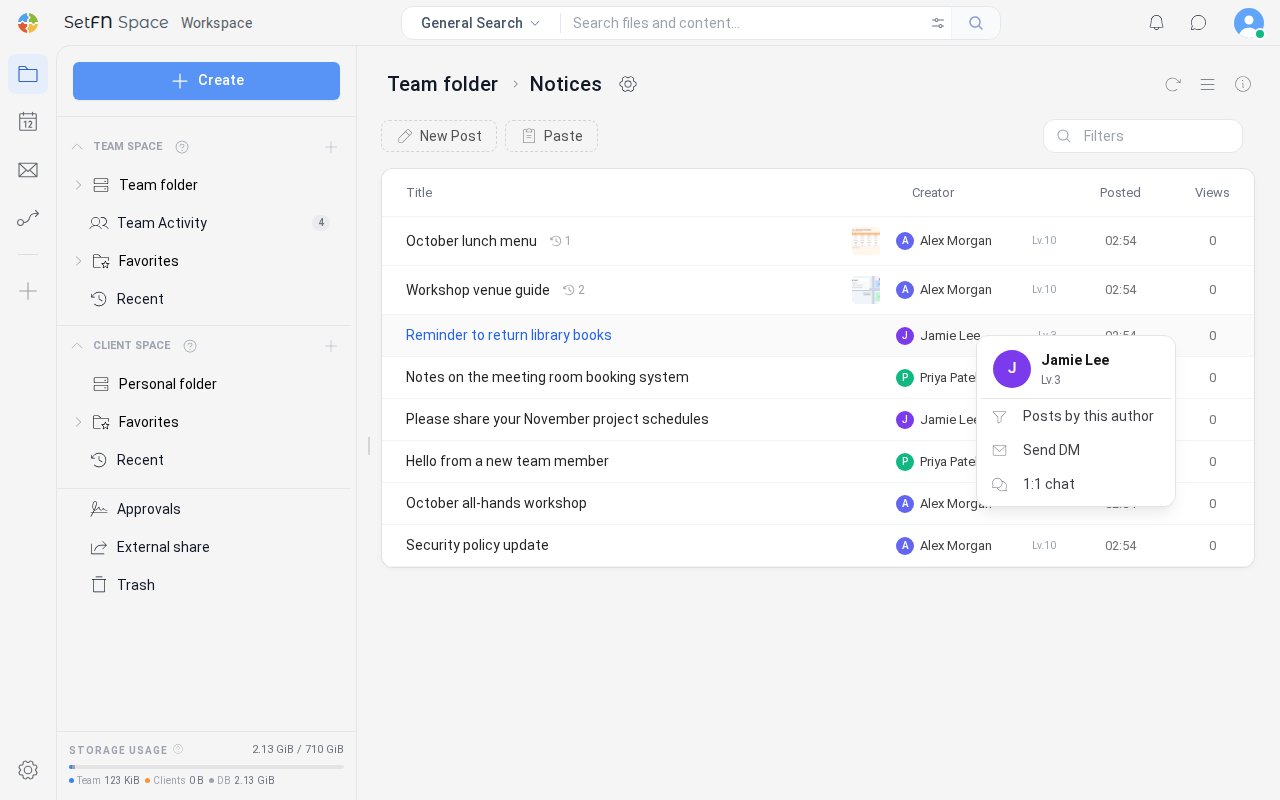
| Item | Description |
|---|---|
Posts by this author | Shows only that author's posts and displays an Author: name chip. Select the chip to clear the filter and return to the full list. |
Send DM | Sends a direct message to that author. For details, see Direct Messages. |
1:1 chat | Starts a 1:1 chat with that author. For details, see Chat. |
Send DM and 1:1 chat are not shown for posts you wrote yourself or for posts by an author with no user information.
Edit or delete a post
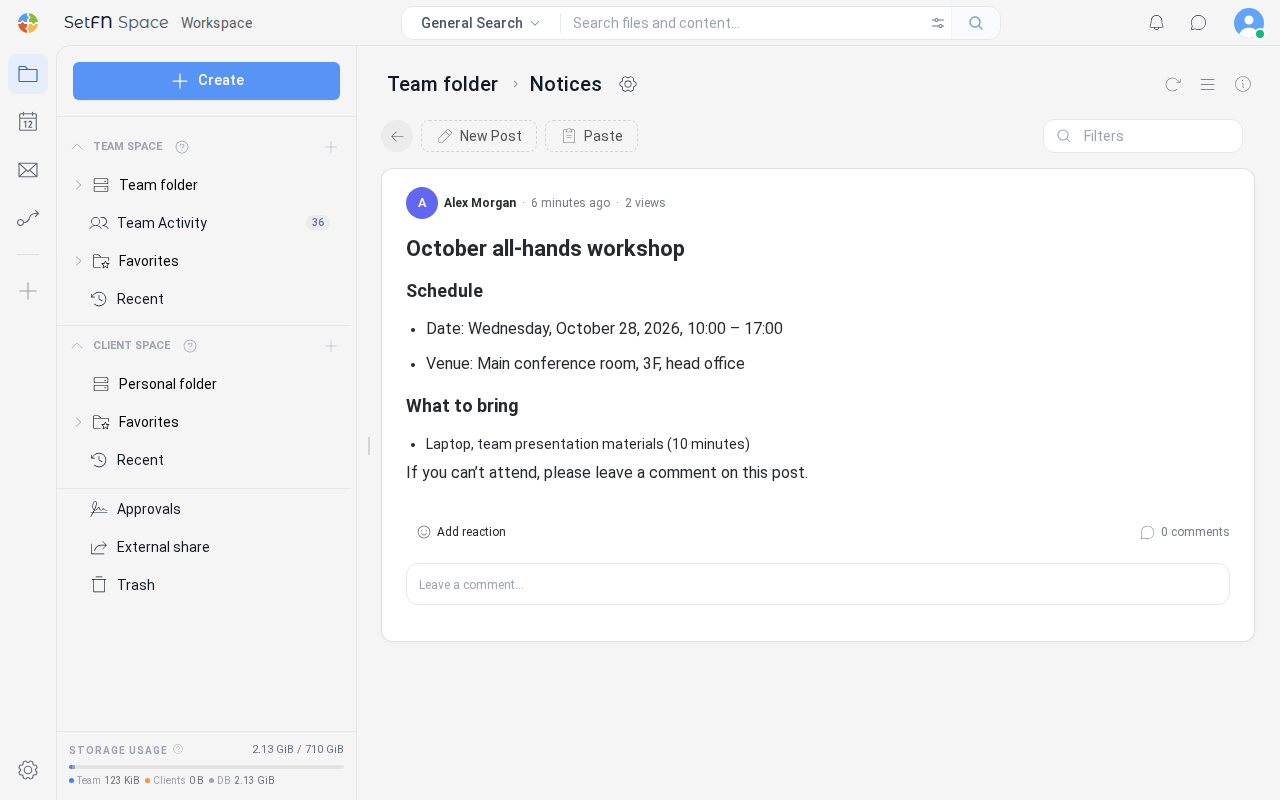
Use the pencil (Edit) and trash can (Delete) icons at the top right of the details screen to edit or delete a post. Select Edit to open the viewer's edit mode. Select Delete to open the Are you sure you want to move it to the trash? confirmation window. Select Move to Trash there to move the post to the trash.
Because Only authors can edit or delete is on by default for boards, these icons are shown only to the person who wrote the post, administrators, and the person who created the board folder. They are not shown on other people's posts.
Good to Know
- Files whose names start with
.are not shown on the board. - A post title is the file name without the
.md,.markdown, or image extension. For other files, such as PDFs, the extension is shown as it is. - In the left sidebar, a board folder is shown with a board icon that differs from a regular folder. For a folder that has never been opened, the icon changes after the list of its parent folder has been displayed once.
- You cannot create a new subfolder inside a board folder that has allowed extensions specified.
- If you open a post that you do not have permission to view, a notice appears in place of the body. If your level is too low,
Access Restricted by Access Levelappears together withRequired levelandMy Level. Otherwise,You can't view this postappears.