'/%3e%3cpath%20id='cross_2'%20data-name='cross%202'%20class='cls-2'%20d='M20.612,30.43h0a5.361,5.361,0,1,0-10.723,0H0A33.709,33.709,0,0,1,30.569,0V9.75a5.361,5.361,0,1,1,0,10.723V30.43Z'%20transform='translate(67.193%200.007)%20rotate(90)'/%3e%3cpath%20id='cross_3'%20data-name='cross%203'%20class='cls-3'%20d='M20.612,30.43h0a5.361,5.361,0,1,0-10.723,0H0A33.709,33.709,0,0,1,30.569,0V9.75a5.361,5.361,0,1,1,0,10.723V30.43Z'%20transform='translate(67.186%2067.041)%20rotate(180)'/%3e%3cpath%20id='cross_4'%20data-name='cross%204'%20class='cls-4'%20d='M20.6,30.5h0a5.361,5.361,0,1,0-10.723,0H0A33.71,33.71,0,0,1,30.56,0V9.818a5.361,5.361,0,1,1,0,10.723V30.5Z'%20transform='translate(0%2067.041)%20rotate(-90)'/%3e%3c/svg%3e)
Team Management
The team feature lets you group users by department, project, or role. You can also create team-only folders that only specific teams can access.
Enabling the Team Feature
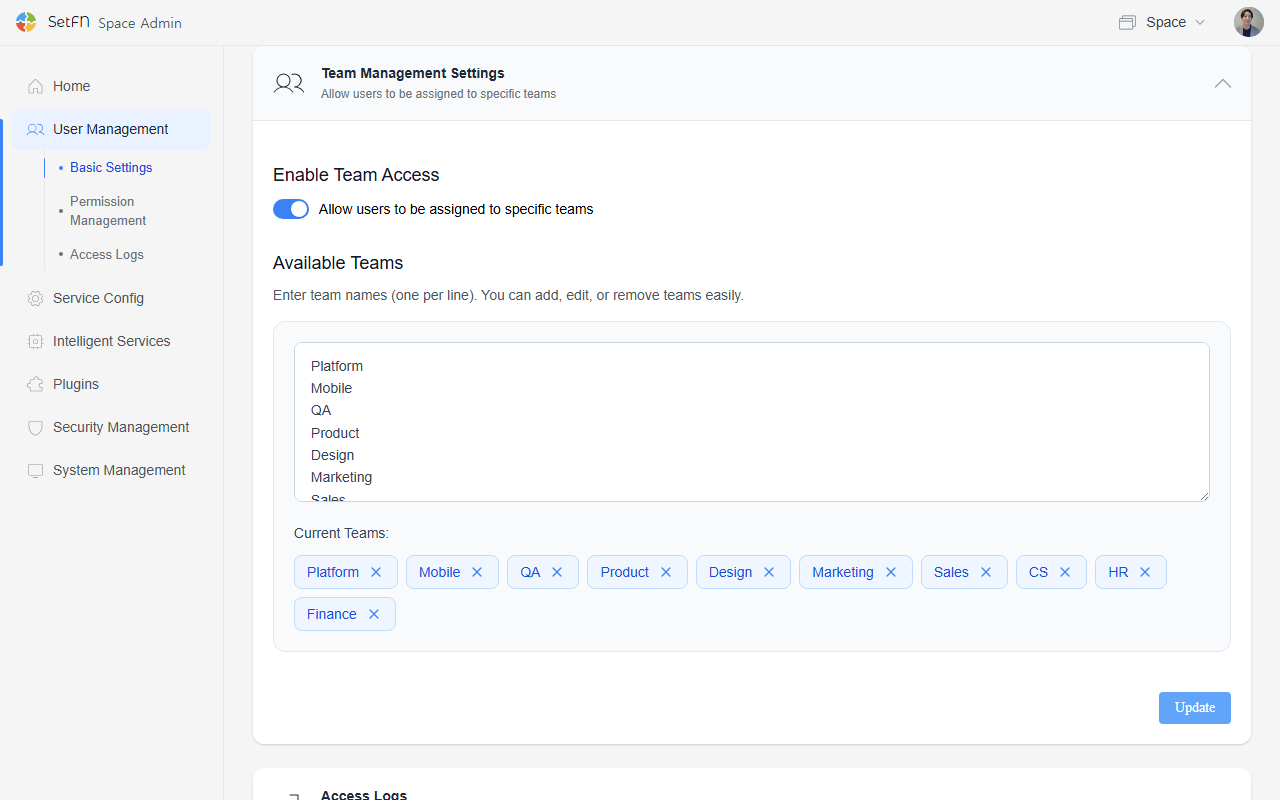
Go to User Management - General Settings - Team Management Settings and click the Enable Team Access button.
Adding a Team
- In the
Available Teamsinput field, enter one team name per line. - Registered teams are displayed as tags in
Current Team List. You can delete them with the X button. - Clicking Apply immediately reflects the team settings.
Assigning a Team to a User
- Go to
User Management>User List. - Find the user you want to assign a team to and click the edit icon (✏️️).
- In the Team field, check the teams the user belongs to. A single user can belong to multiple teams.
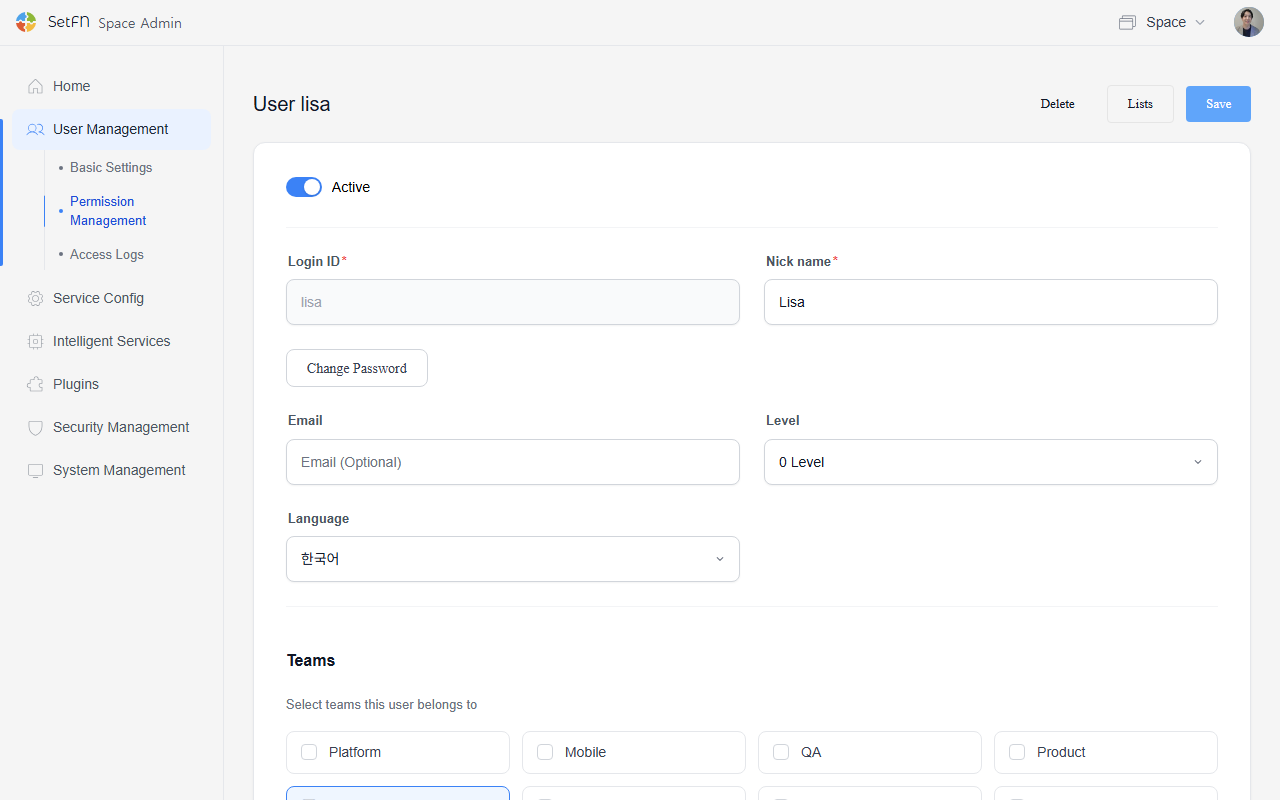
- Click the Save button.
Setting Up Team Folders
You can divide folder access permissions by team. See the link below for how to set up team folders.
Example Use Case
- Managing project folders: Create a folder for people participating in a specific project, and use team settings to give them access to that folder.
Good to Know
- Deleting a team removes the team membership of all users belonging to that team.
- Team-only folders remain, but access to them may be restricted.
- To rename a team, you must delete the existing team and create a new one with the new name.
- To further tighten the security of team folders, disable "Show in Team/Level Folder List" in the space settings. This makes the folder itself invisible to users on other teams.