'/%3e%3cpath%20id='cross_2'%20data-name='cross%202'%20class='cls-2'%20d='M20.612,30.43h0a5.361,5.361,0,1,0-10.723,0H0A33.709,33.709,0,0,1,30.569,0V9.75a5.361,5.361,0,1,1,0,10.723V30.43Z'%20transform='translate(67.193%200.007)%20rotate(90)'/%3e%3cpath%20id='cross_3'%20data-name='cross%203'%20class='cls-3'%20d='M20.612,30.43h0a5.361,5.361,0,1,0-10.723,0H0A33.709,33.709,0,0,1,30.569,0V9.75a5.361,5.361,0,1,1,0,10.723V30.43Z'%20transform='translate(67.186%2067.041)%20rotate(180)'/%3e%3cpath%20id='cross_4'%20data-name='cross%204'%20class='cls-4'%20d='M20.6,30.5h0a5.361,5.361,0,1,0-10.723,0H0A33.71,33.71,0,0,1,30.56,0V9.818a5.361,5.361,0,1,1,0,10.723V30.5Z'%20transform='translate(0%2067.041)%20rotate(-90)'/%3e%3c/svg%3e)
Configure CAPTCHA
Use CAPTCHA to reduce automated registrations and large volumes of authentication requests. Enable it separately for login, signup and password recovery.
Before you begin
- Required permission: administrator
- Available only with built-in login authentication.
- Prepare a site key and secret key for Google reCAPTCHA v2 checkbox or Cloudflare Turnstile. reCAPTCHA v3 keys are unsupported.
- Add the hostname used to access your space to the key's allowed domains.
Configure keys and target screens
- Select
User Management>Account & Security. - Expand
Robot check (CAPTCHA). - Select
Google reCAPTCHAorCloudflare Turnstileas the provider. - For reCAPTCHA, check the script domain. Select
www.recaptcha.netifwww.google.comis inaccessible. - Enter the site key and secret key.
- Enable the screens where verification is required.
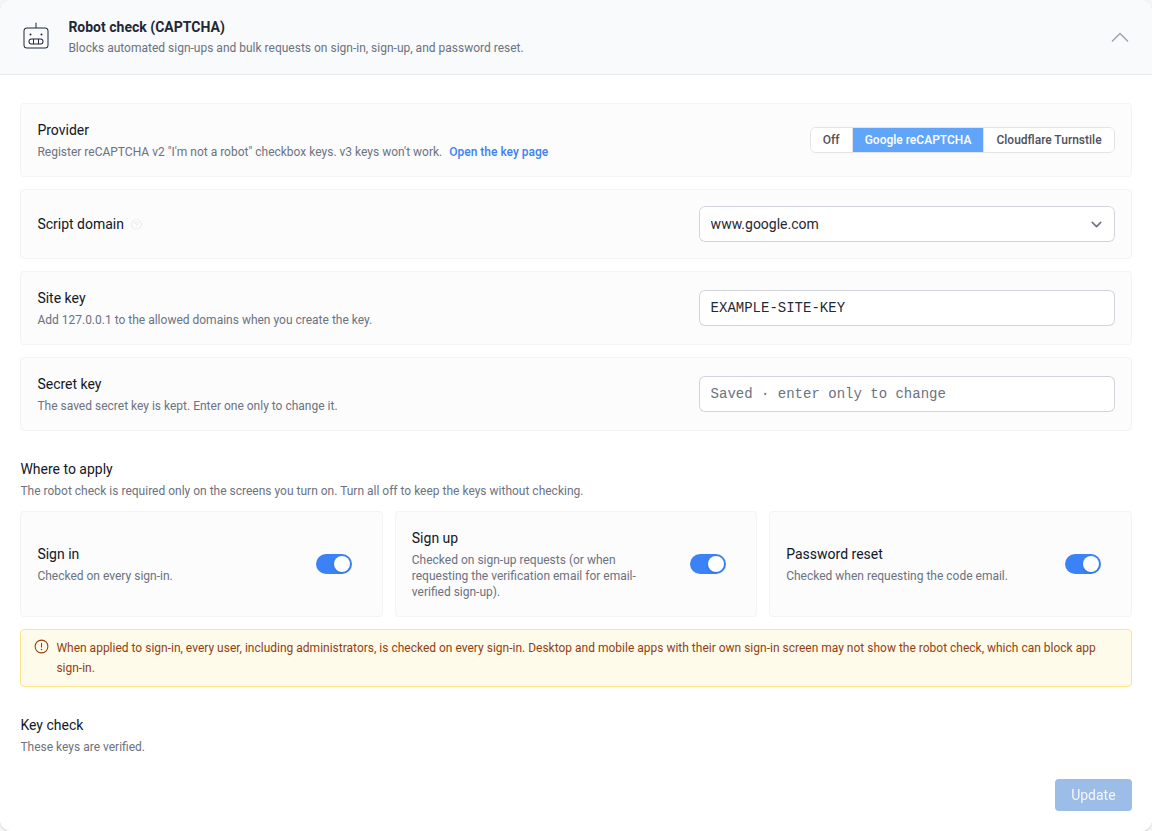
| Screen | When verification occurs |
|---|---|
| Login | On every login. |
| Signup | When requesting signup; with email verification, when requesting the verification email. |
| Password recovery | When requesting an email with a verification code. |
Verify and apply new keys
- Open the verification widget under the key verification section.
- Pass the displayed challenge.
- Check the success message and select
Update. - Check the provider and enabled screens in the collapsed summary.
New keys must pass widget verification before being applied to a target screen. Repeat verification if the token expires or is rejected. For site key errors, check allowed domains. For secret key errors, check that the secret matches the site key.
Saved secret keys are not displayed again. Leave the field empty to keep the saved secret for the same provider; enter a value only to replace it.
Stop requiring verification
- Disable all target screens and save to retain the keys without requiring verification. No widget verification is needed when no screens are enabled.
- Select the disabled provider option and save to remove the registered keys as well.