'/%3e%3cpath%20id='cross_2'%20data-name='cross%202'%20class='cls-2'%20d='M20.612,30.43h0a5.361,5.361,0,1,0-10.723,0H0A33.709,33.709,0,0,1,30.569,0V9.75a5.361,5.361,0,1,1,0,10.723V30.43Z'%20transform='translate(67.193%200.007)%20rotate(90)'/%3e%3cpath%20id='cross_3'%20data-name='cross%203'%20class='cls-3'%20d='M20.612,30.43h0a5.361,5.361,0,1,0-10.723,0H0A33.709,33.709,0,0,1,30.569,0V9.75a5.361,5.361,0,1,1,0,10.723V30.43Z'%20transform='translate(67.186%2067.041)%20rotate(180)'/%3e%3cpath%20id='cross_4'%20data-name='cross%204'%20class='cls-4'%20d='M20.6,30.5h0a5.361,5.361,0,1,0-10.723,0H0A33.71,33.71,0,0,1,30.56,0V9.818a5.361,5.361,0,1,1,0,10.723V30.5Z'%20transform='translate(0%2067.041)%20rotate(-90)'/%3e%3c/svg%3e)
Creating an External Share Link
You can create a download link to share a file within SetFN Workspace with external users. You can strengthen security by setting a password, expiration date, and download count limit.
Before You Start
- Required permission: File sharing permission
- Administrator setting: Use external share links must be turned on in File Area Settings. Domain settings must also be configured.
Starting a Share
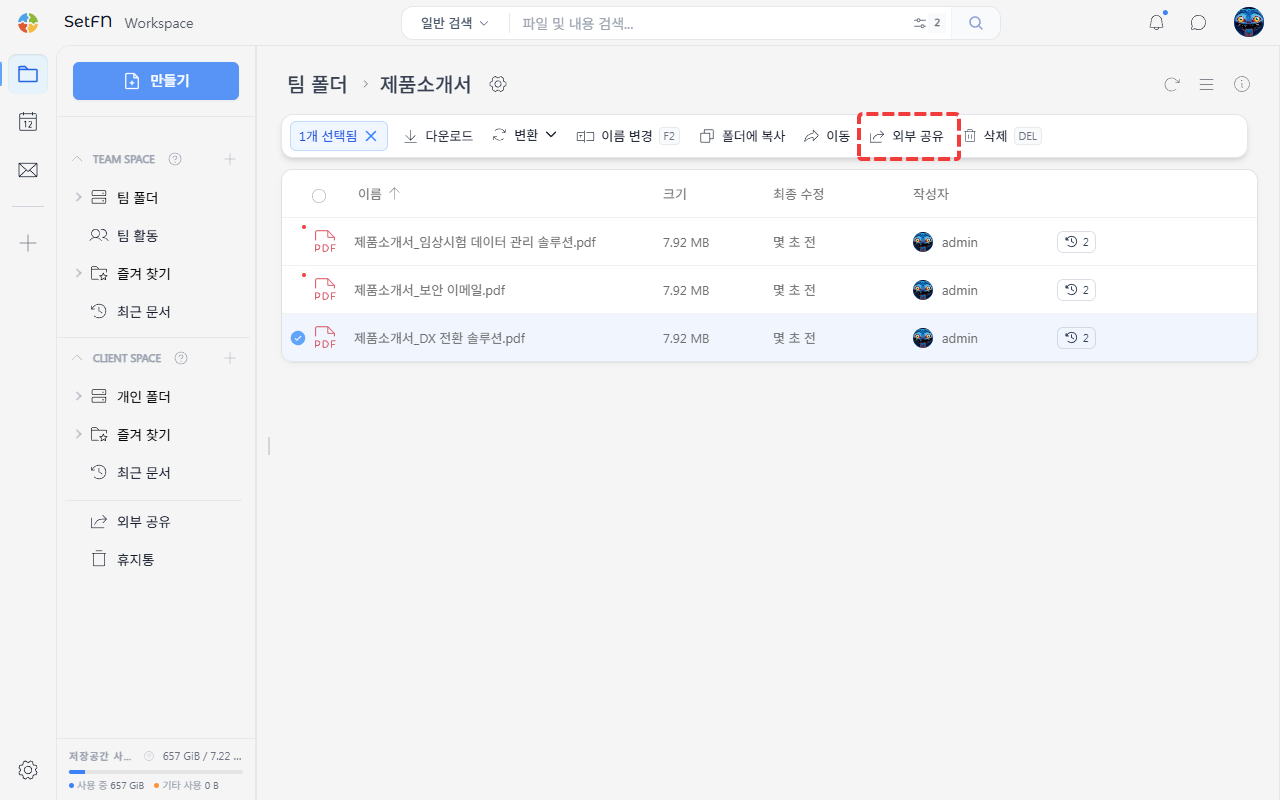
Select the file or folder to share, then click the External Share button at the top. You can also right-click and select External Share → External Link.
- You can select multiple files or folders together to share.
- If there are 2 or more items, they are compressed into a ZIP file for delivery.
Share Settings
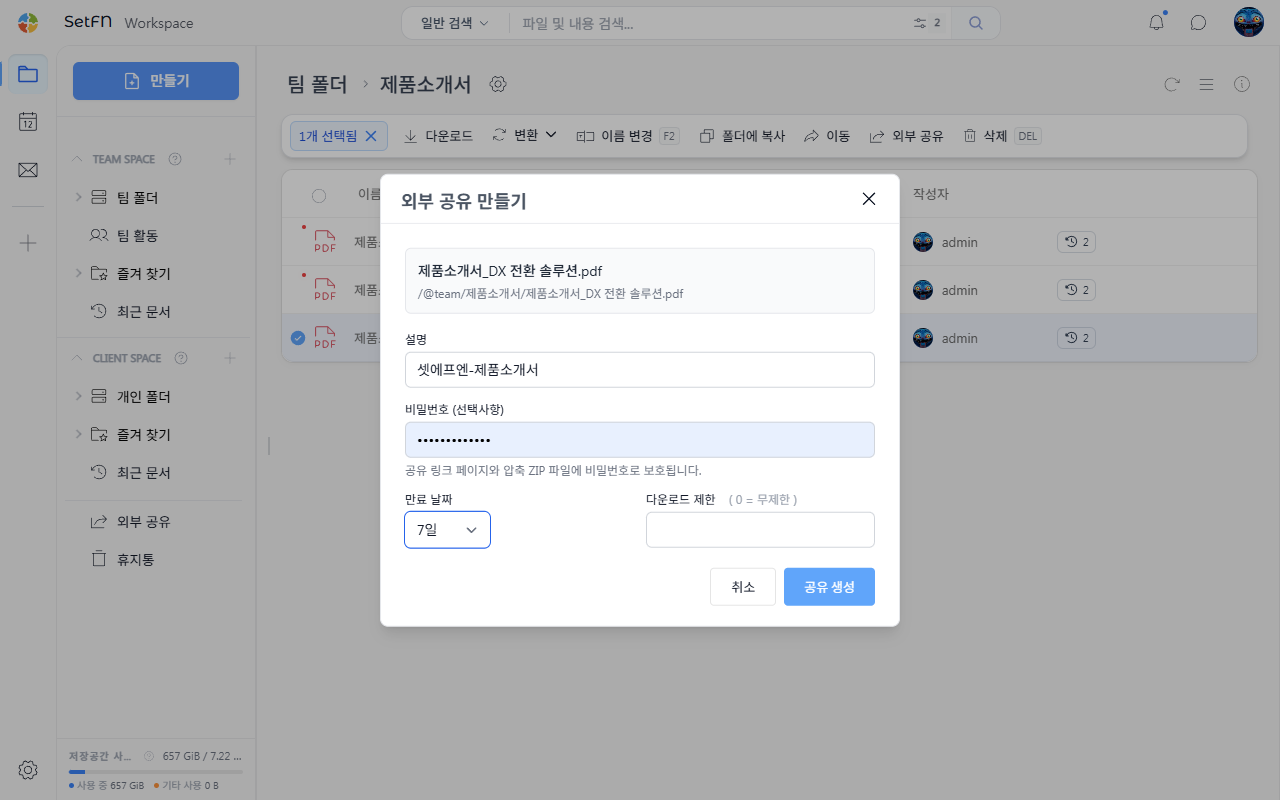
| Item | Description |
|---|---|
| Description | Used as the title of the compressed file when sending multiple files. |
| Password (optional) | The password required for downloading and unzipping. |
| Expiration date | Sets how long the link remains valid. (up to 30 days) |
| Download limit | Sets the number of allowed downloads. (0 means unlimited) |
Link Creation Result
Clicking the Create Share button generates the link.
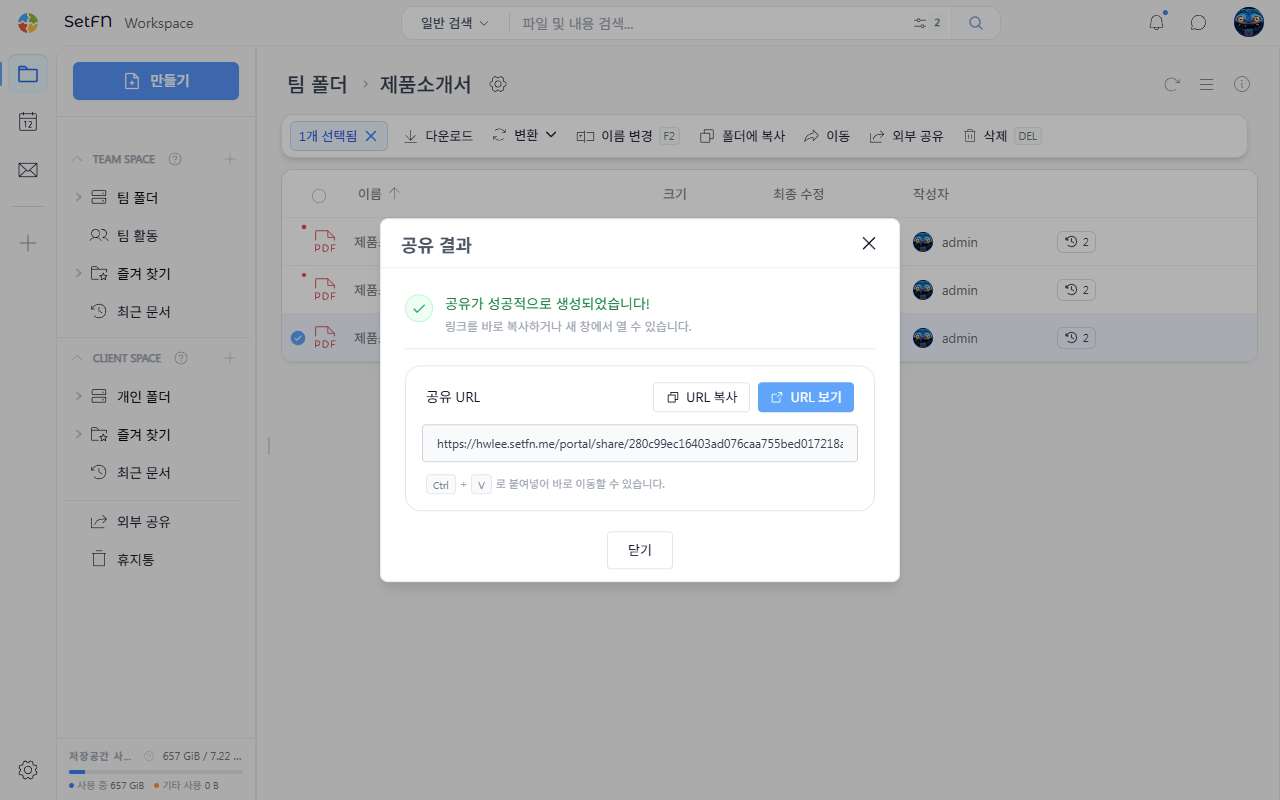
- Copy URL: Copies the link to the clipboard. You can paste it directly into an email or messenger.
- View URL: Takes you to the share page the recipient will actually see.
Share URL Page
Clicking View URL lets you preview the recipient's screen.
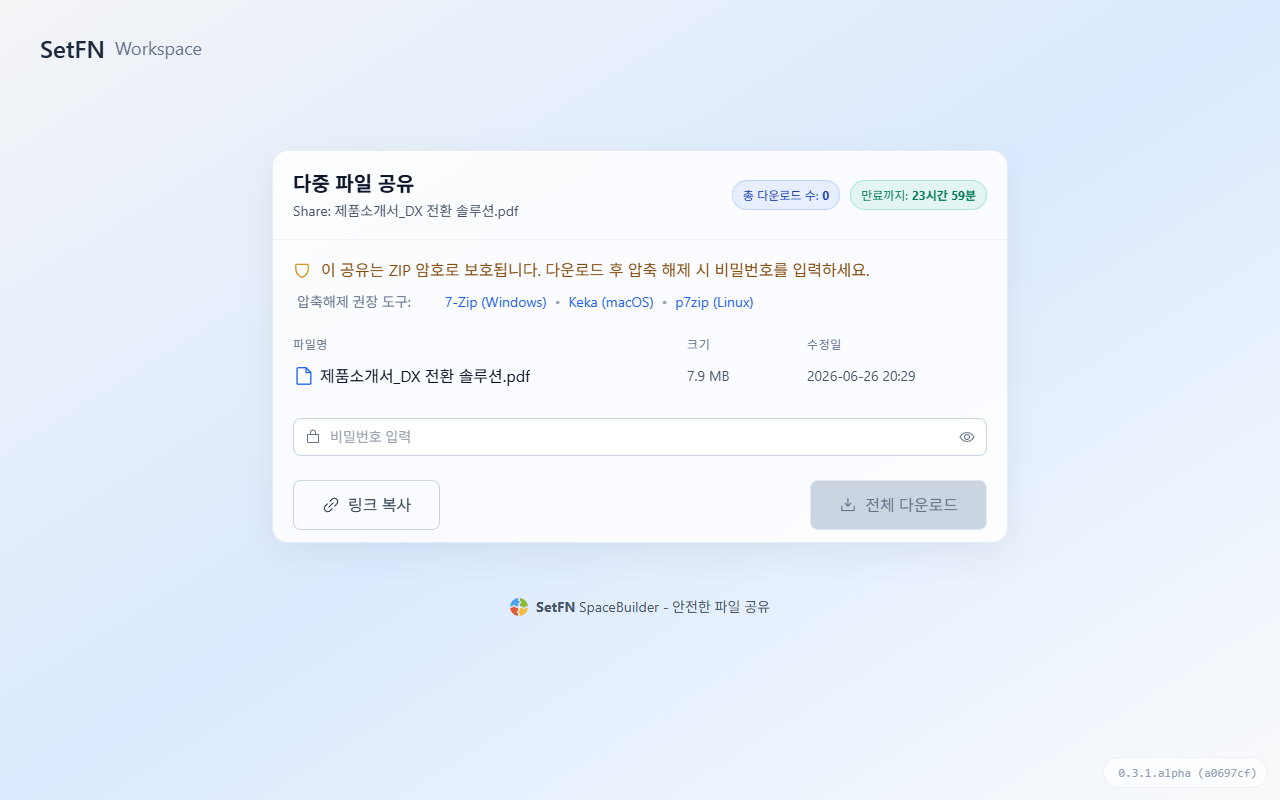
- The total download count and time remaining until expiration are shown at the top.
- If a password is set, the recipient must enter it to download everything.
Managing Links
Management tasks such as viewing the list of created links, checking download counts, copying URLs, deactivating, and deleting are done from the External Share menu in the left sidebar.
Creating a separate link for each recipient lets you track whether each one has downloaded it.