'/%3e%3cpath%20id='cross_2'%20data-name='cross%202'%20class='cls-2'%20d='M20.612,30.43h0a5.361,5.361,0,1,0-10.723,0H0A33.709,33.709,0,0,1,30.569,0V9.75a5.361,5.361,0,1,1,0,10.723V30.43Z'%20transform='translate(67.193%200.007)%20rotate(90)'/%3e%3cpath%20id='cross_3'%20data-name='cross%203'%20class='cls-3'%20d='M20.612,30.43h0a5.361,5.361,0,1,0-10.723,0H0A33.709,33.709,0,0,1,30.569,0V9.75a5.361,5.361,0,1,1,0,10.723V30.43Z'%20transform='translate(67.186%2067.041)%20rotate(180)'/%3e%3cpath%20id='cross_4'%20data-name='cross%204'%20class='cls-4'%20d='M20.6,30.5h0a5.361,5.361,0,1,0-10.723,0H0A33.71,33.71,0,0,1,30.56,0V9.818a5.361,5.361,0,1,1,0,10.723V30.5Z'%20transform='translate(0%2067.041)%20rotate(-90)'/%3e%3c/svg%3e)
Build your own business system
In the SetFN workspace, you can build systems such as your company's own groupware or ERP yourself. Leave the database structure design and the screen creation to AI. All you need to do is produce the results and upload them to the workspace. There are 2 files to create. Your tasks are to upload them and click the 'Deploy' button. This document builds an 'inventory management program for a manufacturing site' as an example.
If you want to try the completed files right away without the AI prompts, you can get the schema, index.html, mock-db-upload.html, and the README at once from Download the full sample ZIP.
1. Create the .sfn file for creating the database
In the SetFN workspace, you can create a DB with a file called .sfn. Copy an example of a .sfn file and give it to an AI such as Claude, GPT, or Gemini, and describe your requirements, for example "I want to manage the stock of parts and products". The AI then creates the file.
Copy the content below, change the requirements in the lower part, and pass it to the AI.
You are an engineer who designs schema files (.sfn) for SetFN, a no-code backend platform.
A .sfn file is a JSON file with the structure below.

{
  "content-type": "application/setfn-schema",
  "dbType": "sqlite3",
  "apiBuild": {
    "dbName": "db_name_in_lowercase_english_with_underscores",
    "dbEngine": "sqlite",
    "includeClient": false,
    "features": {
      "realtime": { "enabled": false },
      "upload": { "enabled": false },
      "ai-chat": { "enabled": false }
    }
  },
  "data": [
    {
      "table": { "name": "table_name", "cmt": "Description of this table" },
      "columns": [
        { "name": "id", "type": "serial4", "primary": true, "default": "auto_increment" },
        { "name": "column_name", "type": "text", "notnull": true, "cmt": "Column description" },
        { "name": "number_column", "type": "int4", "notnull": true, "default": "0" },
        { "name": "_created_at", "type": "timestamp", "default": "now()" }
      ],
      "permissions": {
        "security": { "login": true },
        "ops": {
          "list": { "login": true },
          "view": { "login": true },
          "create": { "login": true },
          "update": { "login": true },
          "delete": { "login": true, "roles": ["admin"] }
        }
      }
    }
  ]
}

For the column type, use only serial4 (auto-increment PK) / text / int4 (integer) / timestamp.
Add notnull, default, unique, index, and cmt to columns as needed.

Now, in this format, design the DB of an "inventory management system" for a manufacturer. The requirements are as follows.

- Register parts and manage the current stock quantity of each part.
- Register products and manage the current stock quantity of each product.
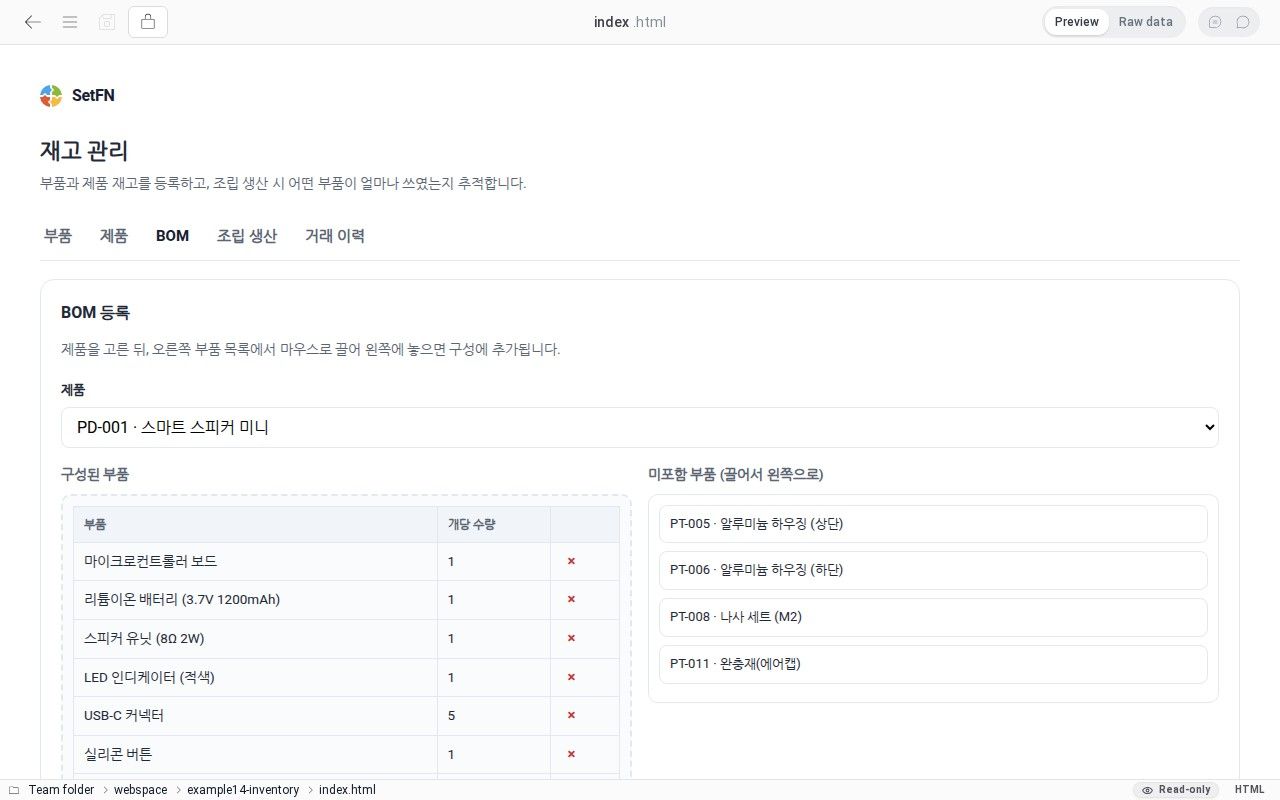
- One product is assembled from multiple parts. Manage which parts each product needs and how many of each (BOM, bill of materials).
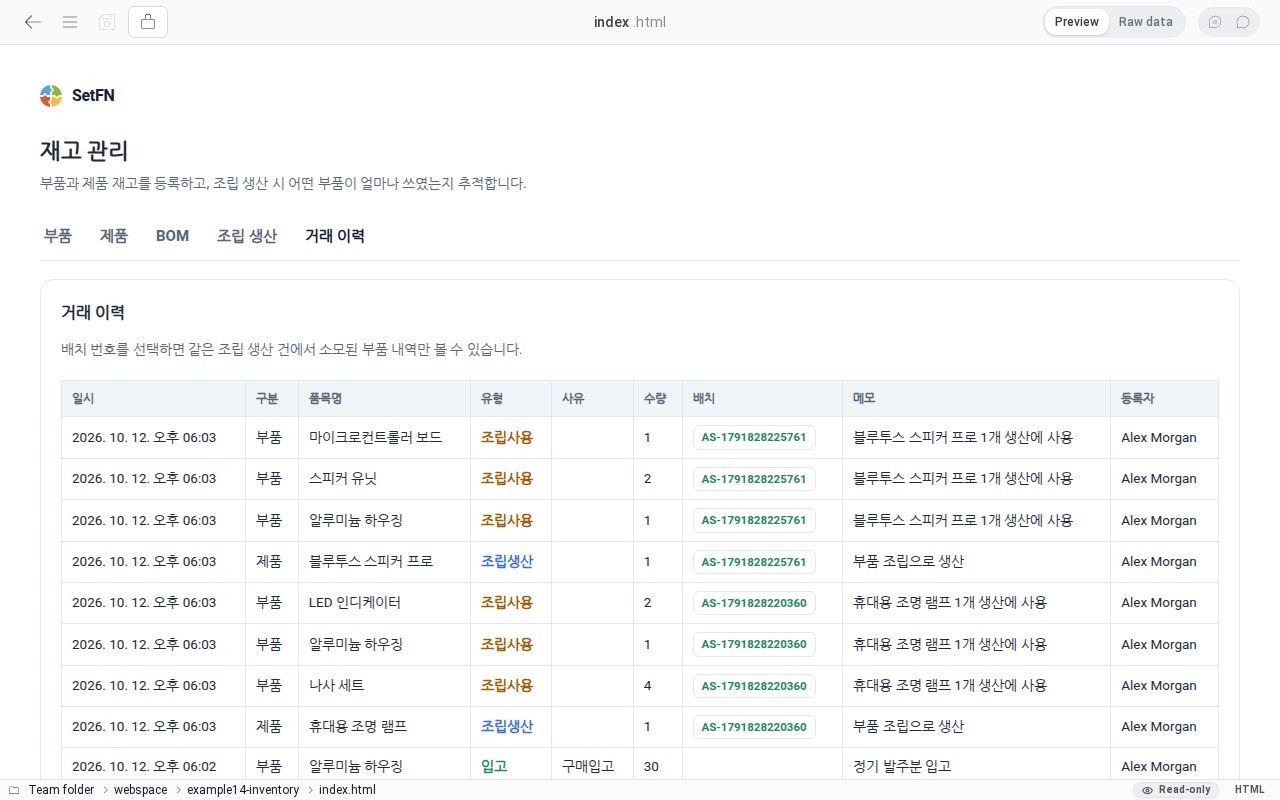
- Keep a history of inbound and outbound movements of parts and products. In particular, when an event of "assembling parts to produce a product" occurs, the parts used at that moment and the quantity of products produced must be tracked together as one event (it must be possible to look up later "how many parts went into making this product").

Set the DB name (dbName) to "inventory_management".
Design it with 4 tables or fewer, practical enough to be used right away in real work.
Output only the completed .sfn JSON code without any other explanation.
The following is an example of an AI response created this way. The actual result can differ slightly for each AI and for each run — it does not need to be exactly this content, and a similar structure is enough. However, the result must start with { and end with } without any other explanation so that you can paste it into the editor as it is.
{
  "content-type": "application/setfn-schema",
  "dbType": "sqlite3",
  "apiBuild": {
    "dbName": "inventory_management",
    "dbEngine": "sqlite",
    "includeClient": false,
    "features": {
      "realtime": { "enabled": false },
      "upload": { "enabled": false },
      "ai-chat": { "enabled": false }
    }
  },
  "data": [
    {
      "table": { "name": "parts", "cmt": "Parts master. Any member can view/register/edit; only administrators can delete" },
      "columns": [
        { "name": "id", "type": "serial4", "primary": true, "default": "auto_increment" },
        { "name": "part_code", "type": "text", "notnull": true, "unique": true, "cmt": "Part code" },
        { "name": "name", "type": "text", "notnull": true, "cmt": "Part name" },
        { "name": "spec", "type": "text", "cmt": "Specification (e.g. M2, 220V/50Hz). Even with the same name, register a separate part_code if the specification differs" },
        { "name": "category", "type": "text", "cmt": "Part category (electronic parts/mechanical parts/packaging materials, etc.)" },
        { "name": "unit", "type": "text", "notnull": true, "default": "EA", "cmt": "Unit" },
        { "name": "unit_cost", "type": "int4", "notnull": true, "default": "0", "cmt": "Unit cost" },
        { "name": "current_stock", "type": "int4", "notnull": true, "default": "0", "cmt": "Current stock" },
        { "name": "safety_stock", "type": "int4", "notnull": true, "default": "0", "cmt": "Safety stock (reorder point)" },
        { "name": "supplier", "type": "text", "cmt": "Supplier" },
        { "name": "_user_id", "type": "int4", "notnull": true, "index": true },
        { "name": "_nick", "type": "text", "cmt": "Display name of the member who last registered/edited it" },
        { "name": "_created_at", "type": "timestamp", "default": "now()" }
      ],
      "permissions": {
        "security": { "login": true, "ownerColumn": "_user_id" },
        "ops": {
          "list": { "login": true },
          "view": { "login": true },
          "create": { "login": true },
          "update": { "login": true },
          "delete": { "login": true, "roles": ["admin"] }
        }
      }
    },
    {
      "table": { "name": "products", "cmt": "Products master. Any member can view/register/edit; only administrators can delete" },
      "columns": [
        { "name": "id", "type": "serial4", "primary": true, "default": "auto_increment" },
        { "name": "product_code", "type": "text", "notnull": true, "unique": true, "cmt": "Product code" },
        { "name": "name", "type": "text", "notnull": true, "cmt": "Product name" },
        { "name": "category", "type": "text", "cmt": "Product category" },
        { "name": "unit", "type": "text", "notnull": true, "default": "EA", "cmt": "Unit" },
        { "name": "price", "type": "int4", "notnull": true, "default": "0", "cmt": "Selling price" },
        { "name": "current_stock", "type": "int4", "notnull": true, "default": "0", "cmt": "Current stock" },
        { "name": "_user_id", "type": "int4", "notnull": true, "index": true },
        { "name": "_nick", "type": "text", "cmt": "Display name of the member who last registered/edited it" },
        { "name": "_created_at", "type": "timestamp", "default": "now()" }
      ],
      "permissions": {
        "security": { "login": true, "ownerColumn": "_user_id" },
        "ops": {
          "list": { "login": true },
          "view": { "login": true },
          "create": { "login": true },
          "update": { "login": true },
          "delete": { "login": true, "roles": ["admin"] }
        }
      }
    },
    {
      "table": { "name": "bom", "cmt": "Bill of materials per product (single level). A unique constraint on bom_key (product_id:part_id) prevents the same part from being registered twice for the same product" },
      "columns": [
        { "name": "id", "type": "serial4", "primary": true, "default": "auto_increment" },
        { "name": "product_id", "type": "int4", "notnull": true, "index": true },
        { "name": "part_id", "type": "int4", "notnull": true, "index": true },
        { "name": "qty_per_unit", "type": "int4", "notnull": true, "default": "1", "cmt": "Quantity of the part required to make 1 unit of the product" },
        { "name": "bom_key", "type": "text", "notnull": true, "unique": true, "cmt": "Combination of product_id:part_id. Used to prevent duplicate registration" },
        { "name": "_user_id", "type": "int4", "notnull": true, "index": true },
        { "name": "_nick", "type": "text", "cmt": "Display name of the member who registered it" },
        { "name": "_created_at", "type": "timestamp", "default": "now()" }
      ],
      "permissions": {
        "security": { "login": true, "ownerColumn": "_user_id" },
        "ops": {
          "list": { "login": true },
          "view": { "login": true },
          "create": { "login": true },
          "update": { "login": true },
          "delete": { "login": true, "roles": ["admin"] }
        }
      }
    },
    {
      "table": { "name": "stock_transactions", "cmt": "Unified history of inbound/outbound movements and assembly. item_type=part|product, tx_type=입고|출고|조립사용|조립생산 (inbound|outbound|assembly use|assembly production). One assembly production event consists of multiple assembly use records (parts consumed) + 1 assembly production record (product increased) that share the same batch_id, so you can track which parts were used for a product and how many" },
      "columns": [
        { "name": "id", "type": "serial4", "primary": true, "default": "auto_increment" },
        { "name": "item_type", "type": "text", "notnull": true, "cmt": "part | product" },
        { "name": "item_id", "type": "int4", "notnull": true, "index": true, "cmt": "parts.id or products.id" },
        { "name": "item_name", "type": "text", "notnull": true, "cmt": "Snapshot of the item name at the time of registration" },
        { "name": "tx_type", "type": "text", "notnull": true, "cmt": "입고 (inbound) | 출고 (outbound) | 조립사용 (assembly use) | 조립생산 (assembly production)" },
        { "name": "reason", "type": "text", "cmt": "Reason for the inbound/outbound movement. Left empty for assembly use/assembly production because tx_type itself is the reason" },
        { "name": "qty", "type": "int4", "notnull": true, "cmt": "Always positive. The direction is determined by tx_type" },
        { "name": "batch_id", "type": "text", "index": true, "cmt": "ID that groups an assembly production event. Empty for simple inbound/outbound movements" },
        { "name": "note", "type": "text", "cmt": "Note" },
        { "name": "_user_id", "type": "int4", "notnull": true, "index": true },
        { "name": "_nick", "type": "text", "cmt": "Display name of the member who registered it" },
        { "name": "_created_at", "type": "timestamp", "default": "now()" }
      ],
      "permissions": {
        "security": { "login": true, "ownerColumn": "_user_id" },
        "ops": {
          "list": { "login": true },
          "view": { "login": true },
          "create": { "login": true },
          "update": { "login": true, "roles": ["admin"] },
          "delete": { "login": true, "roles": ["admin"] }
        }
      }
    }
  ]
}
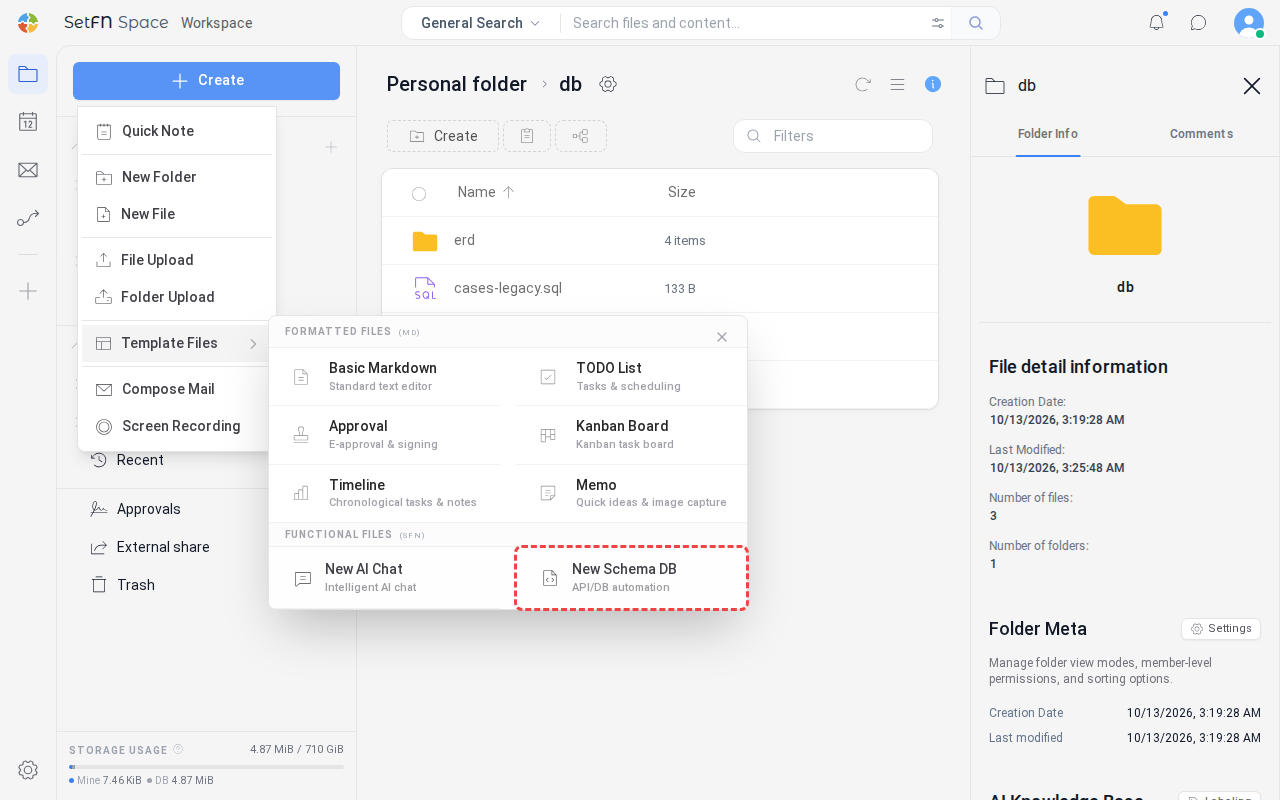
Copy this result, and create an empty schema file in the workspace with Create → Template Files → New Schema DB.
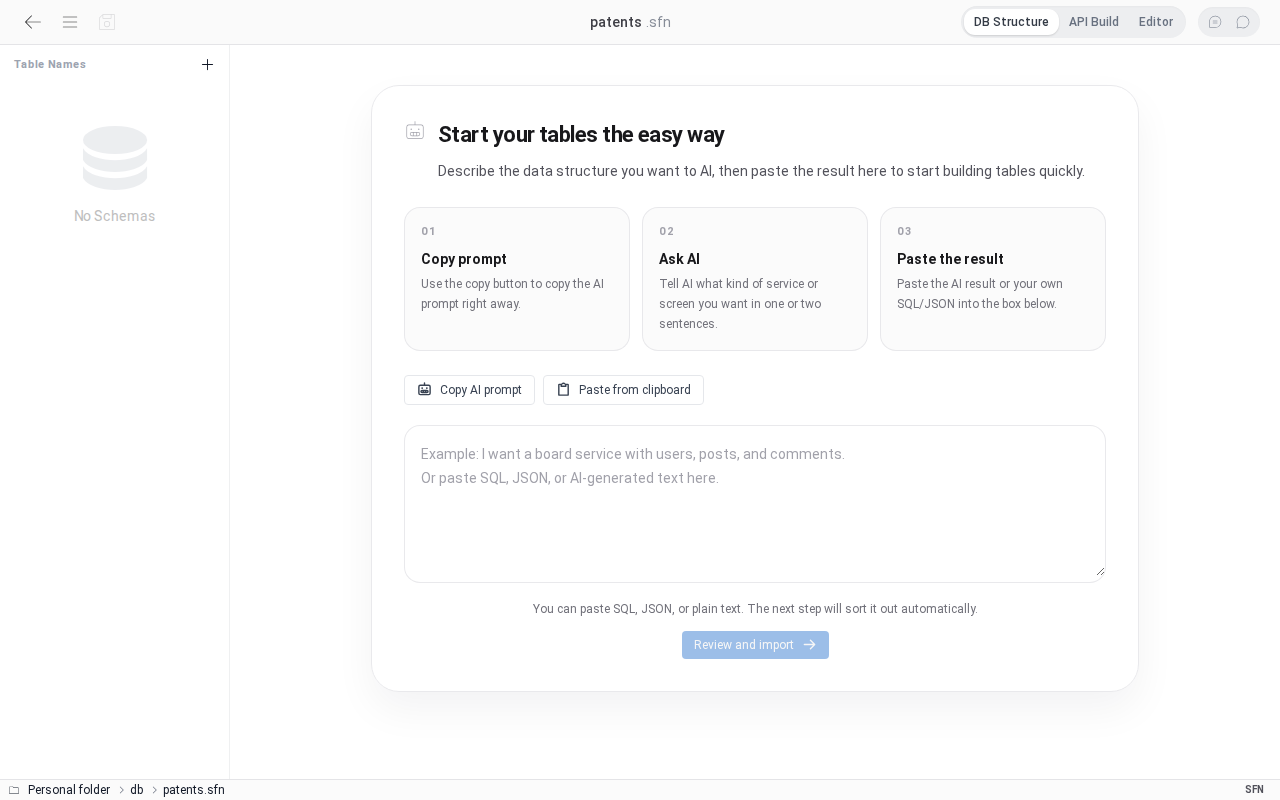
Enter a file name and save to create the empty schema file.
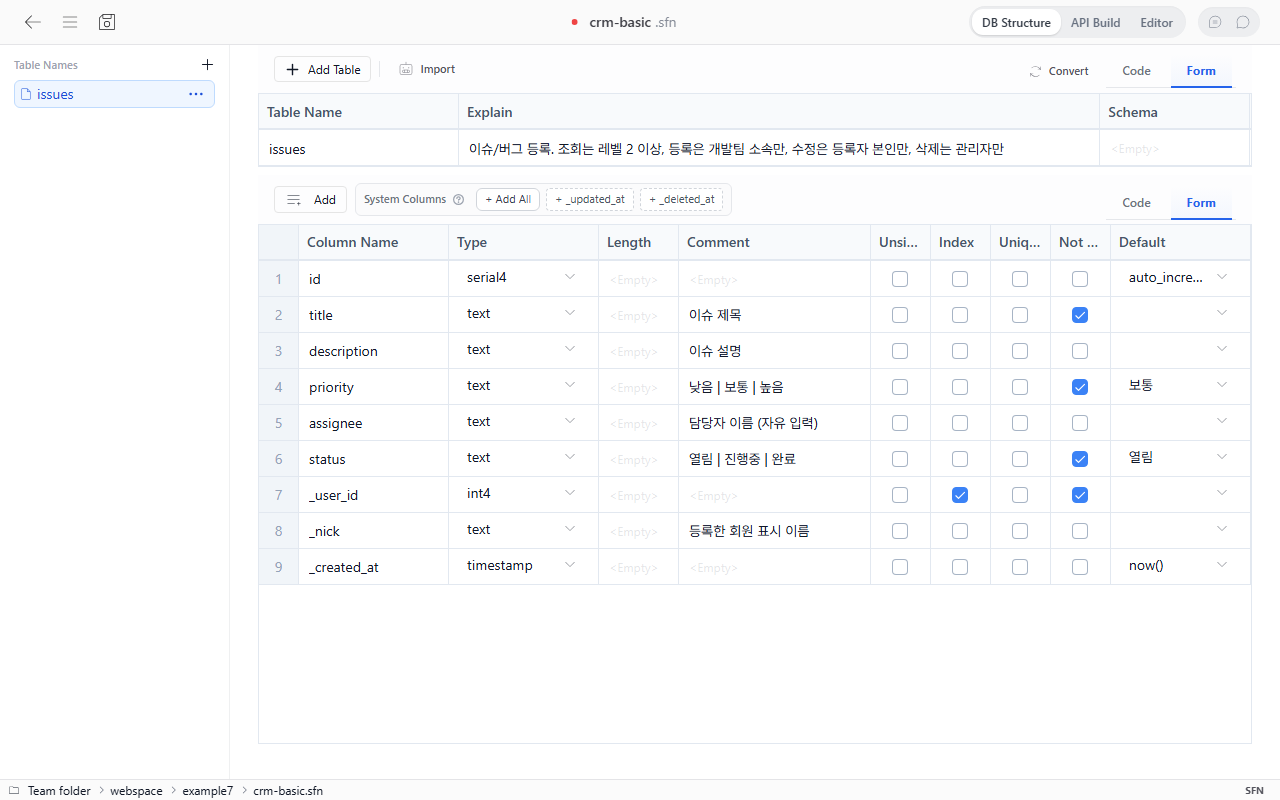
Select the Editor tab at the upper right, and paste the AI response from earlier as it is.
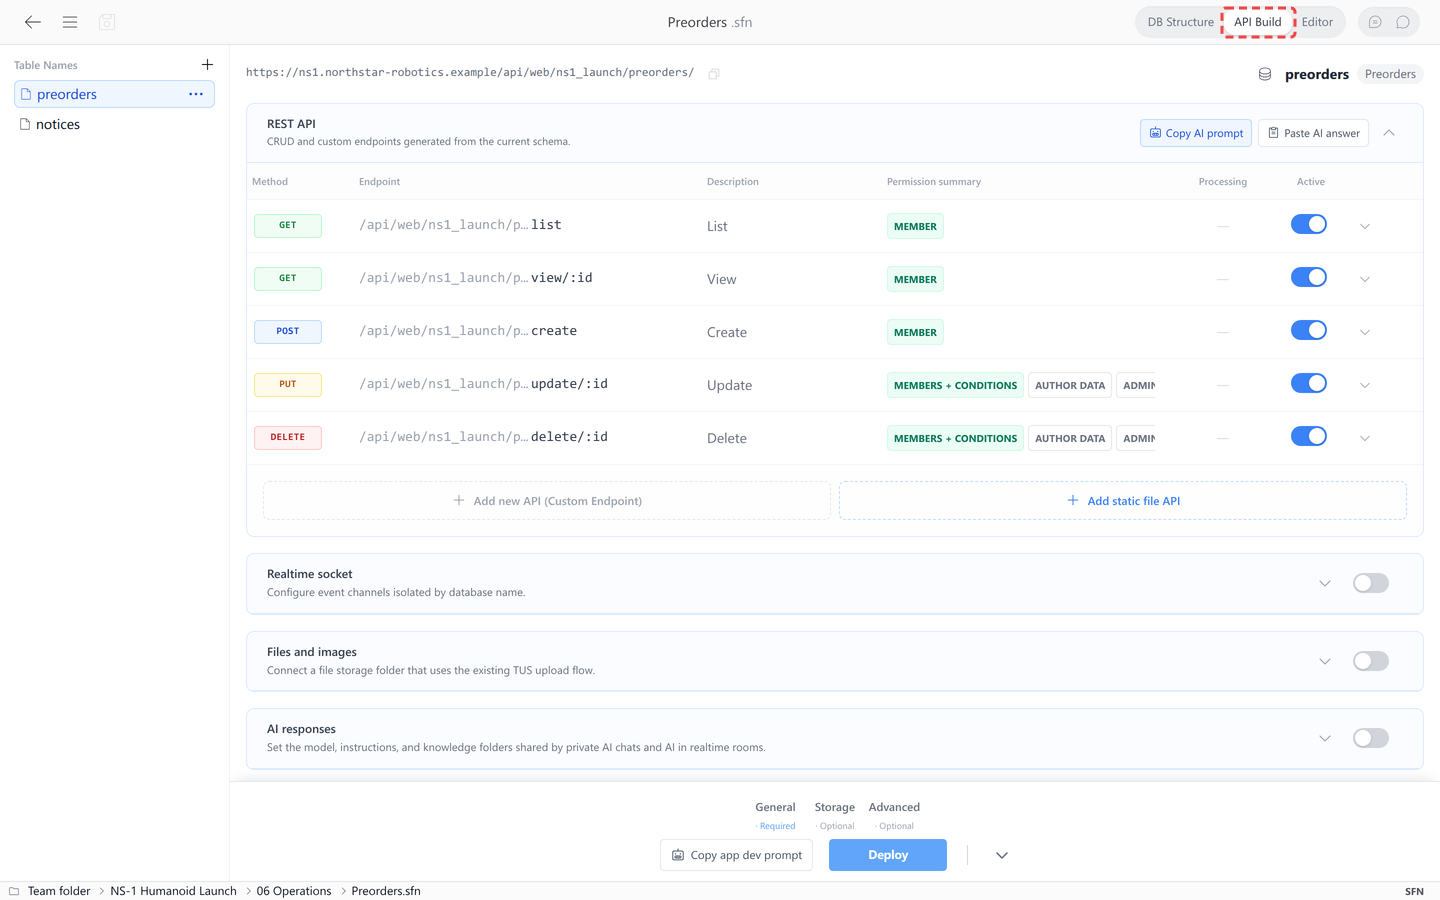
After saving, go to the API Build tab at the top to check the list of APIs generated automatically for each table.
Select Deploy to expand the settings, check the Database identifier, and select Deploy again. After a few seconds, the 'Deployment complete!' message appears. Finally, select the diskette button at the top to save. At this point, the DB setup is finished — the 4 tables for parts, products, the bill of materials, and the inbound/outbound history, and the REST APIs that handle those tables, are actually created and ready to use. Next, create the screen that connects to this DB.
2. Create the .html file for the screen
Ask the AI again this time. Plan and organize what you want to build and pass it to the AI. Give it the content of the .sfn file you created earlier as reference material as well.
- An input form for registering parts and products
- A form for registering inbound and outbound movements
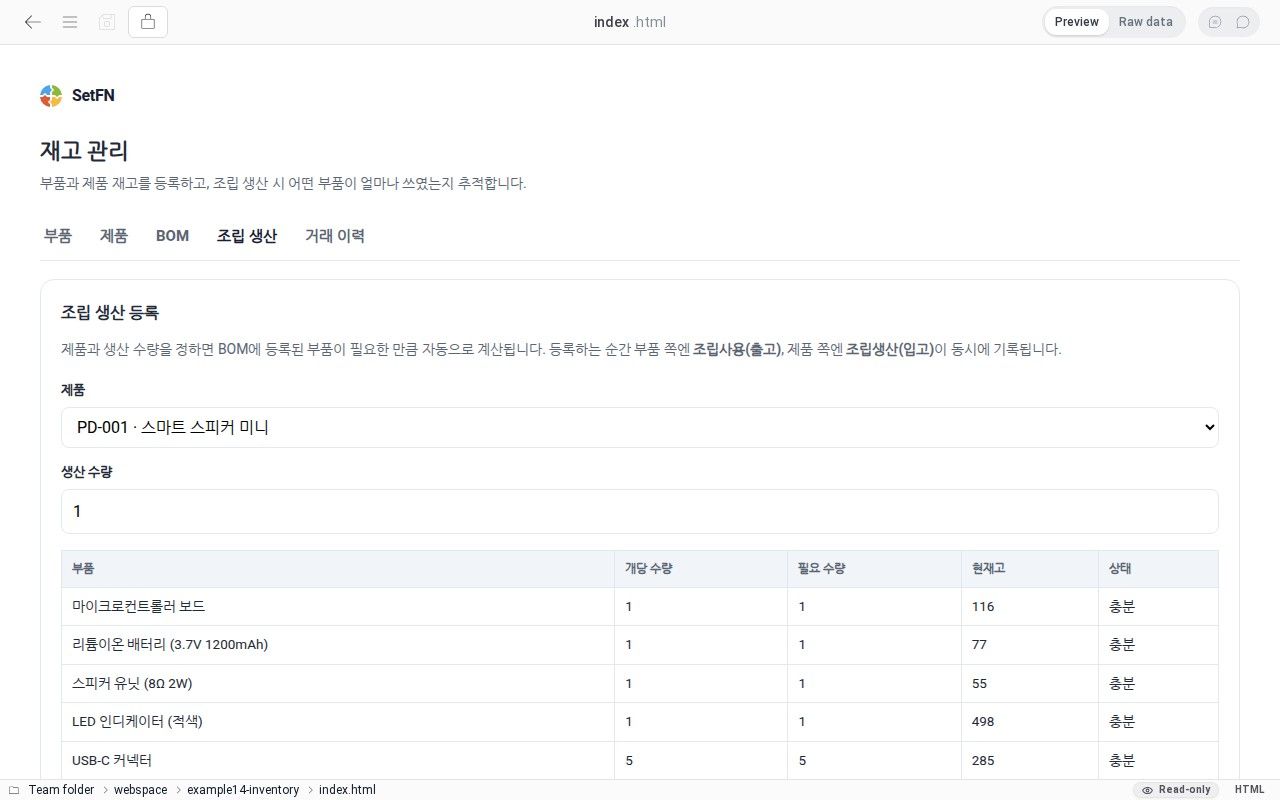
- When you register "this many units of this product were produced", the required part quantities are calculated automatically and applied to the stock
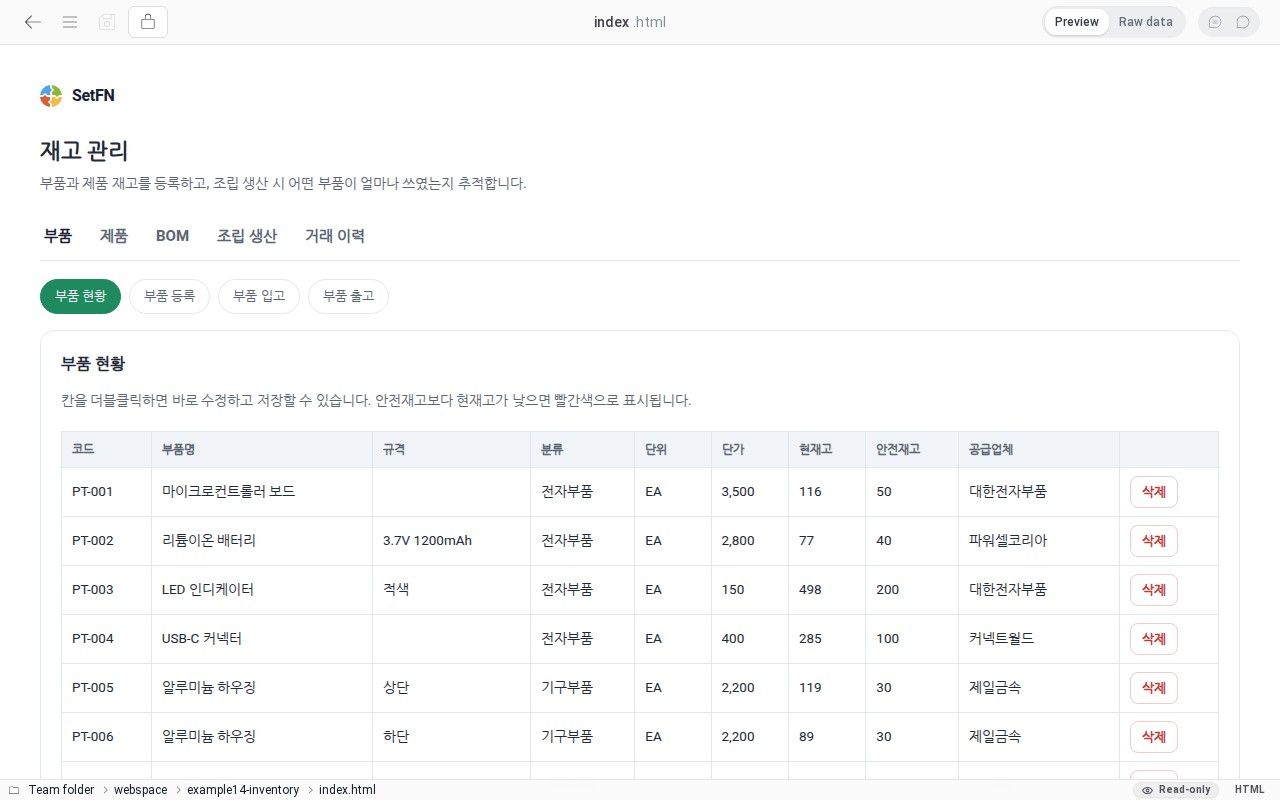
- The current stock status is shown in a table, and values are edited and saved directly in the table
Paste the content below into the AI chat next. (Paste the result created in step 1 together at the very top.)
[Paste the result of step 1 here]

The schema above is already deployed. Create one web screen (index.html) that uses this schema.

When the screen loads and saves data, send requests to the server according to the rules below.

1. To get the API token of the signed-in user:
   POST /api/auth/bootstrap  (credentials: "include")
   Response: { data: { access_token, user: { id, nick } } }

2. Add this header to every request after that: Authorization: Bearer <access_token>

3. Table CRUD:
   List    GET  /api/web/{dbName}/{table}/list?column=value   → response { rows: [...] } (rows can be null when there are no results, so always handle it as rows || [])
   Create  POST /api/web/{dbName}/{table}/create          → body: JSON, response { lastInsertId }
   Update  PUT  /api/web/{dbName}/{table}/update/{id}     → body: JSON (you can send only the changed columns)
   Delete  DELETE /api/web/{dbName}/{table}/delete/{id}

The features required on the screen are as follows.

- An input form for registering new parts and products
- A form for registering inbound and outbound movements of parts/products (registering also updates the current stock quantity)
- A feature that, when you register "this many units of this product were produced", automatically calculates the required part quantities according to the registered bill of materials, deducts the part stock, and increases the product stock. If the part stock is insufficient, block the registration and tell the user.
- A screen that shows the current stock status of parts/products in a table. Clicking a cell in the table lets the user edit and save the value right there.
- A list that shows the inbound/outbound/assembly history in chronological order.

Put everything in one HTML/CSS/JS file. Use a card layout on a clean white background.
Output only the completed index.html code without any other explanation.
The following is an example of an html file created this way. The actual result can differ slightly for each AI.
When you upload this file to the workspace, the screen that your team members can actually use is complete.
3. Fill in test data
To see it actually work, you need data. You can also ask the AI right away to create a screen that fills in example data with one button.
[Paste the result of step 1 here]

The schema above is already deployed, and the index.html that uses this schema has already been created.
Create a screen (mock-db-upload.html) that automatically fills in test data when one button is pressed.

Insert the data into the actual server in the same way as the screen in step 2 (get a token with POST /api/auth/bootstrap, and create with POST /api/web/{dbName}/{table}/create).

- Actually create and insert 10 to 15 parts, 3 to 5 products, the part composition of each product, and a few inbound/outbound history records.
- Fill in the part/product names and quantities with values that would actually be used on a manufacturing site.
- If data with the same code already exists, skip only that item and continue.
- Show the progress on the screen as a log, one line at a time, and display "Done" when finished.
Output only the completed mock-db-upload.html code without any other explanation.
The following is an example of an html file created this way. The actual result can differ slightly for each AI. This screen is not deployed. Open and use it only when you need to prepare a demo.
When you actually enter data and use it, it works like this.
4. Revise repeatedly
You do not need to finish it in one go. As you use the screen, if you find a missing feature or a part you want to fix, keep asking the AI. However, what you need to do next depends on what you change.
- A change that alters the DB structure (tables and columns) — for example, adding a new column or a new table — requires you to get the revised
.sfnagain, paste it intoEditor, and deploy again inAPI Build. - A change that keeps the DB structure and alters only the screen — for example, the design, the wording, or button positions — only requires you to get
index.htmlagain and overwrite the existing file. You do not need to deploy the API again. - When you change the structure of a table that already contains data, check the
Overwrite existing dataoption in the deployment settings. Turning on overwrite permanently deletes the existing data.
With just these four steps, the AI creates everything: the database design, the actual screens, the test data, and the later revisions. After that, keep refining the screen design and the details as you like.