'/%3e%3cpath%20id='cross_2'%20data-name='cross%202'%20class='cls-2'%20d='M20.612,30.43h0a5.361,5.361,0,1,0-10.723,0H0A33.709,33.709,0,0,1,30.569,0V9.75a5.361,5.361,0,1,1,0,10.723V30.43Z'%20transform='translate(67.193%200.007)%20rotate(90)'/%3e%3cpath%20id='cross_3'%20data-name='cross%203'%20class='cls-3'%20d='M20.612,30.43h0a5.361,5.361,0,1,0-10.723,0H0A33.709,33.709,0,0,1,30.569,0V9.75a5.361,5.361,0,1,1,0,10.723V30.43Z'%20transform='translate(67.186%2067.041)%20rotate(180)'/%3e%3cpath%20id='cross_4'%20data-name='cross%204'%20class='cls-4'%20d='M20.6,30.5h0a5.361,5.361,0,1,0-10.723,0H0A33.71,33.71,0,0,1,30.56,0V9.818a5.361,5.361,0,1,1,0,10.723V30.5Z'%20transform='translate(0%2067.041)%20rotate(-90)'/%3e%3c/svg%3e)
Create a schema file (.sfn)
WebSpace starts with a small file. Define the data and permissions in a schema file (.sfn) and deploy it to prepare a database and APIs together. You can then build a service that stores interface input and displays updates to other users in real time.
A schema file is the service blueprint. Saving it does not change the running database. Deploy it from API Build to apply it to the runtime.
Workflow
- Create a schema file.
- Configure tables and columns.
- Review access permissions for each API.
- Select a storage engine and deploy.
- Call the generated APIs from HTML or an app.
You do not need to complete everything at once. Start with one small table, enter data from an actual interface, then add the structures and permissions you need.
Create a new schema file
In the workspace, select Create > Template file > New schema (DB).
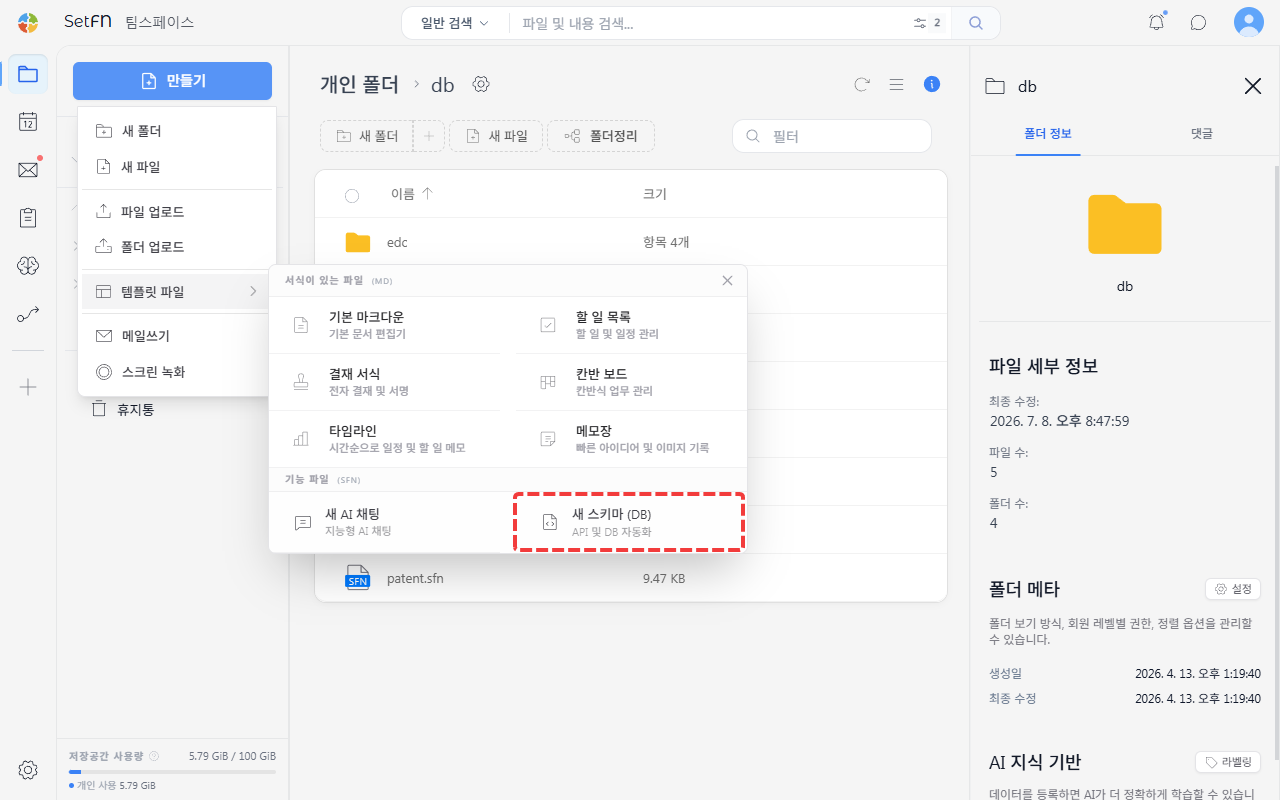
Enter a file name and save it.
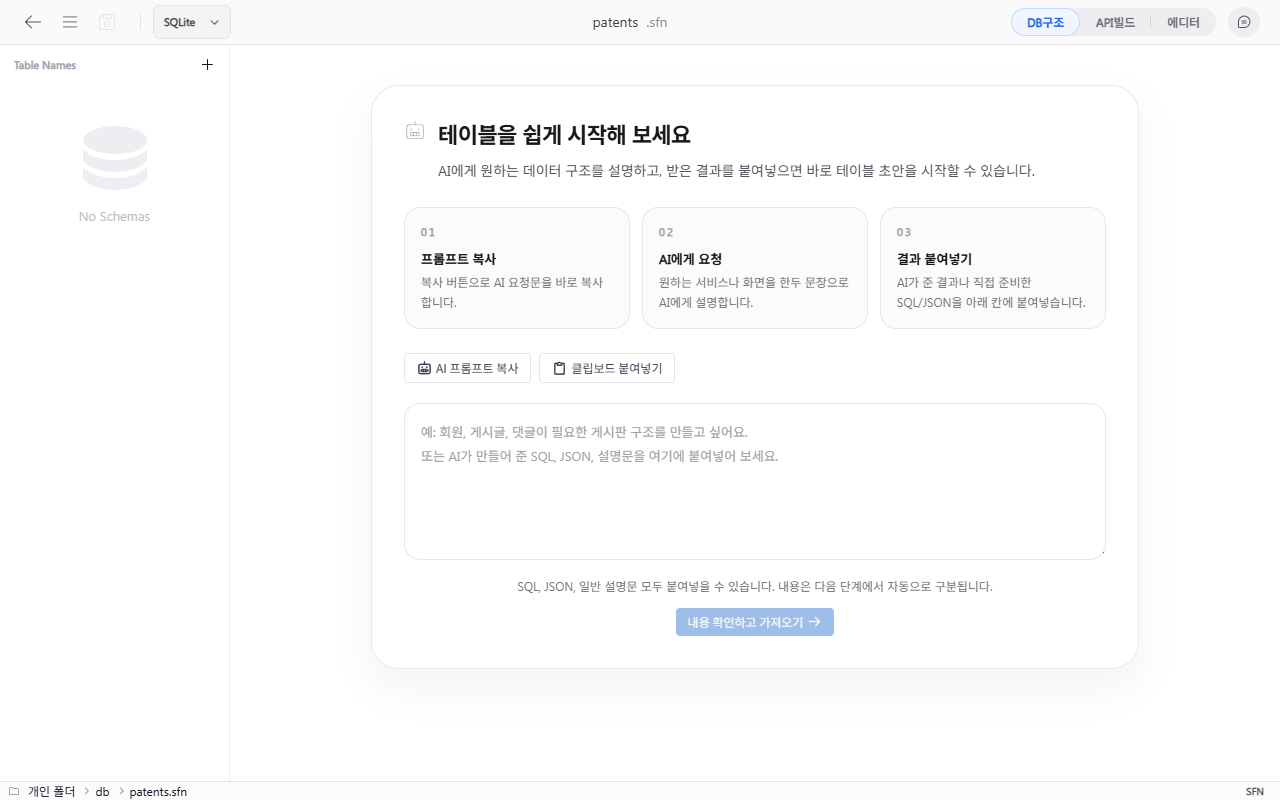
You do not select a database engine at this stage. Build the data structure first, then select SQLite3, PostgreSQL, MySQL, or MariaDB during deployment.
Build the data structure
Build it directly, generate an initial draft with AI, or import existing SQL.
1. Generate a draft with AI
You do not need to know every database term. Describe the information you want to manage and who should manage it, and AI can generate a starting structure.
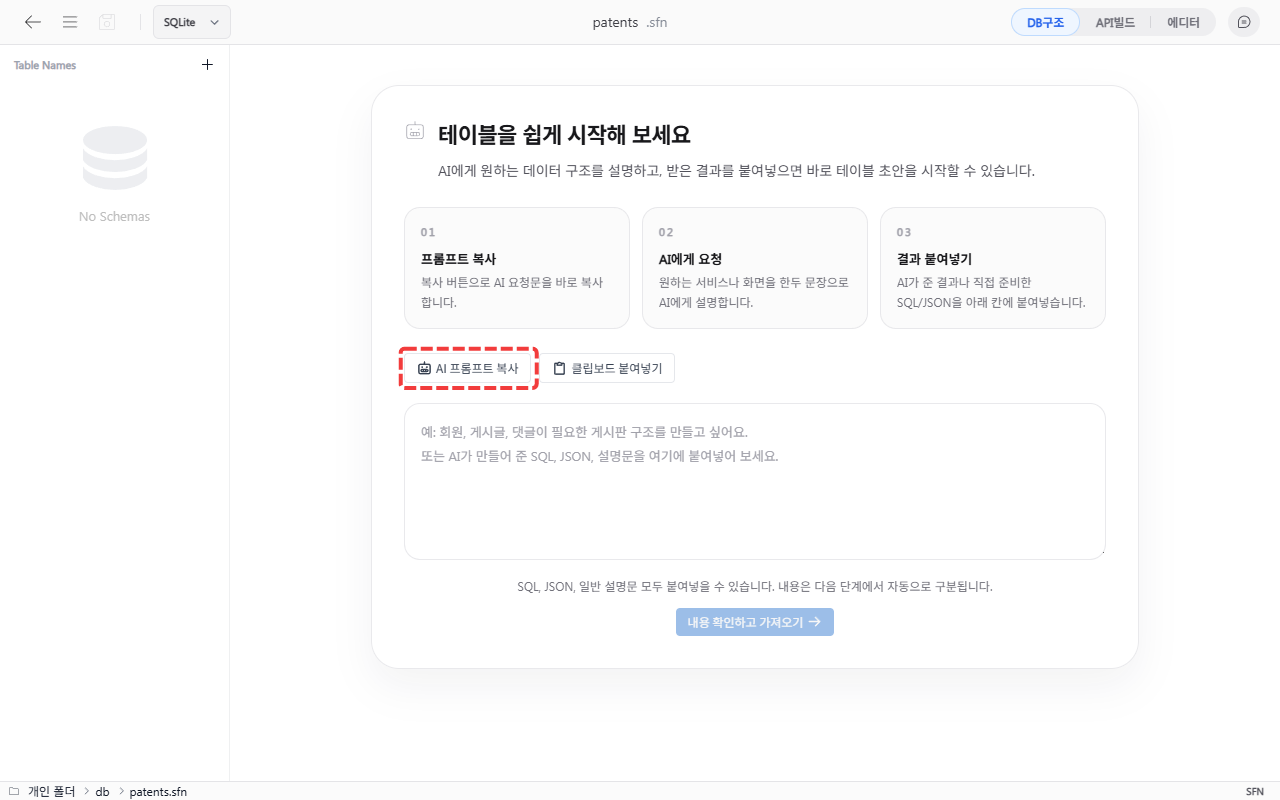
- Select
Copy AI prompt. - Paste the copied prompt into the AI service you use.
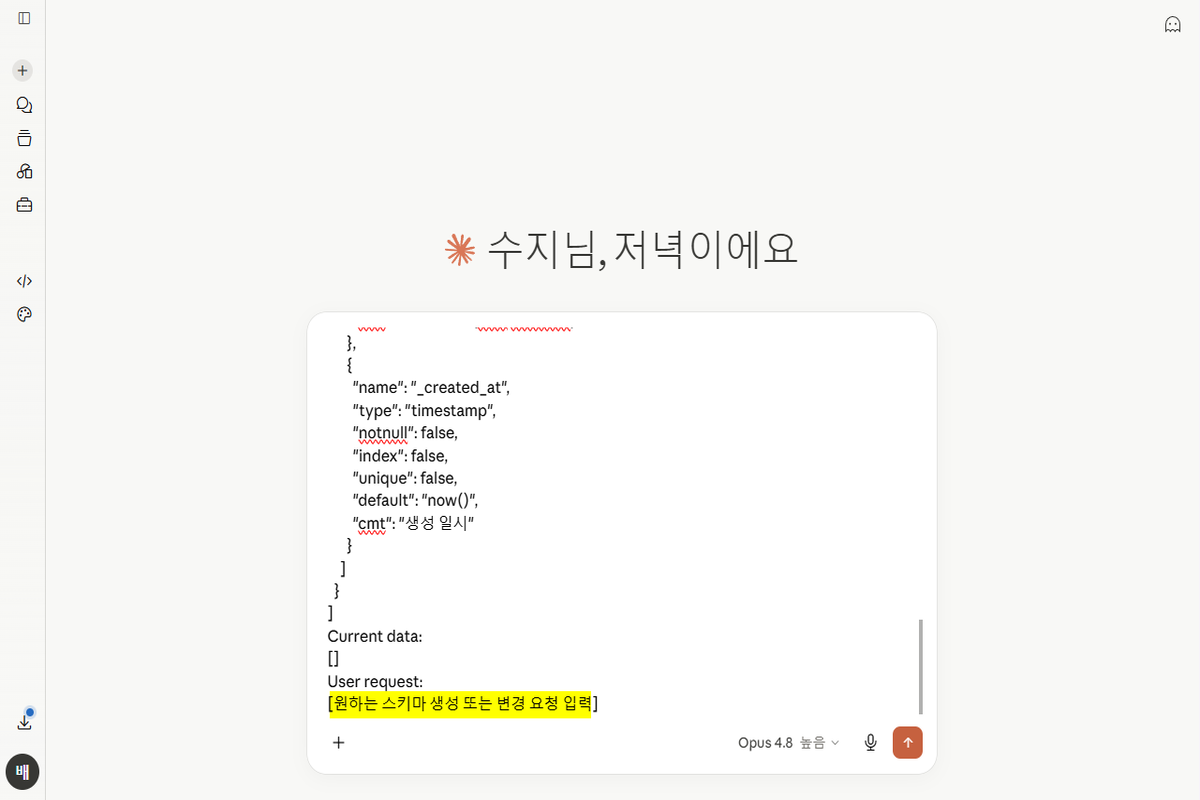
- Under
User request, describe the service you want to build.Example: Manage patent names, application numbers, owners, and progress. Allow only the assigned owner and administrators to edit records.
- Copy the JSON produced by the AI and paste it into the import screen.
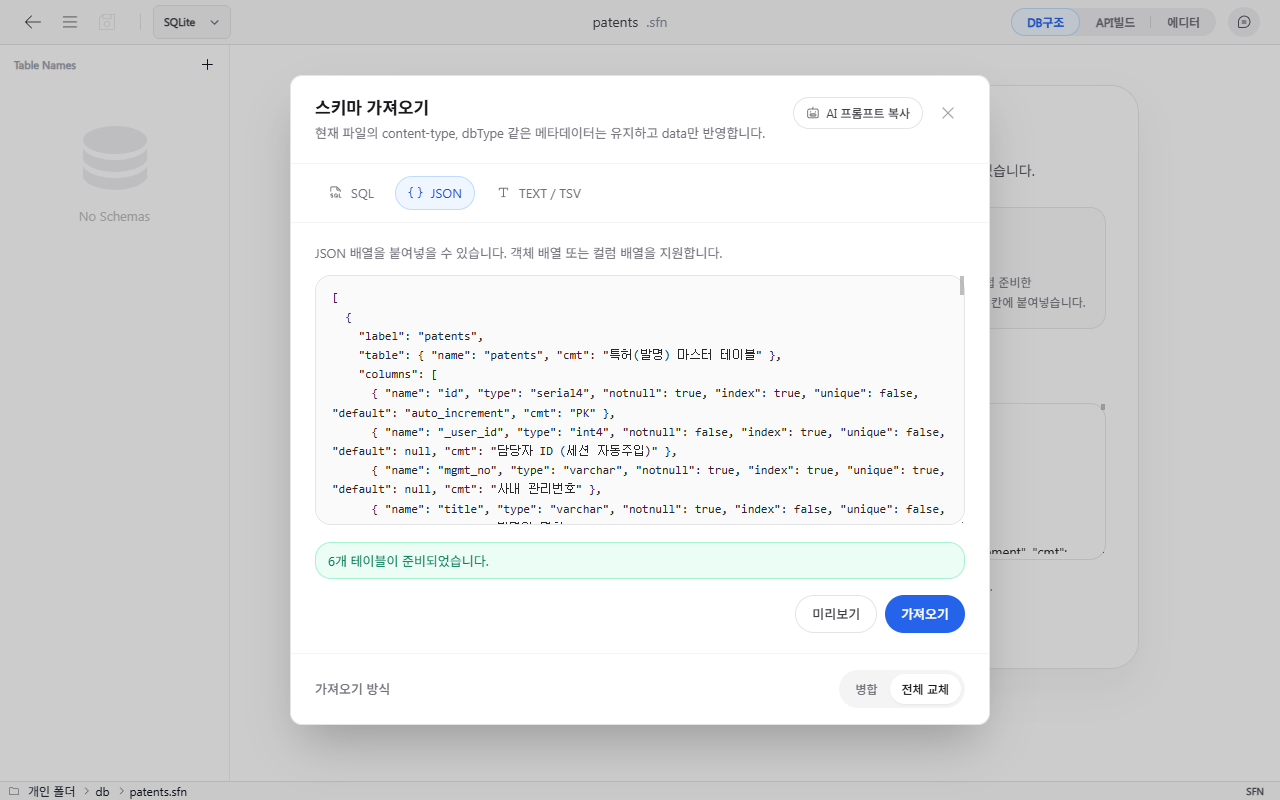
- Select
Importto create the database tables.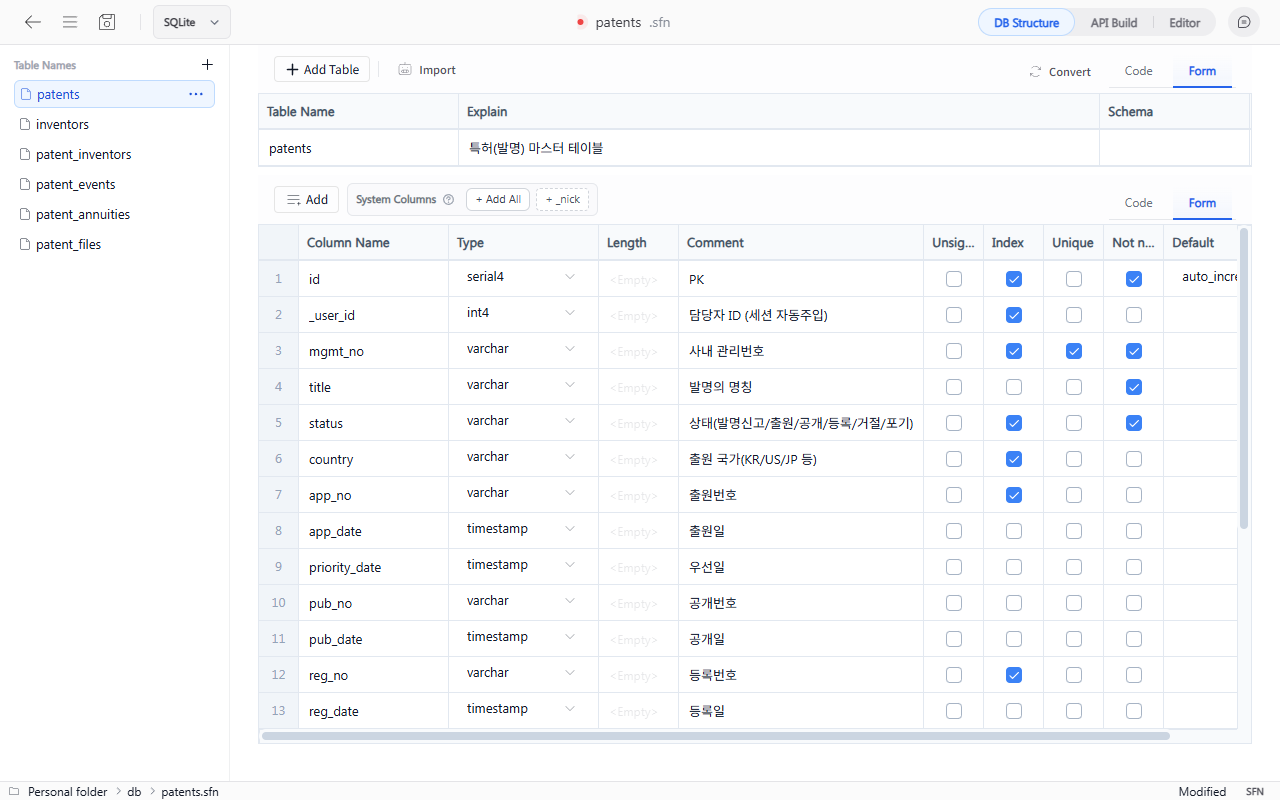
The copied instructions include the schema format and authoring rules. Prefer a structure that works with multiple storage engines over SQL tied to one database.
AI output is only a draft. Before deployment, check that names are clear, identify any personal information, and verify who should be able to read and update the data.
2. Import SQL
Under Import > SQL, paste existing CREATE TABLE statements. WebSpace reads common SQLite, PostgreSQL, and MySQL/MariaDB types, defaults, indexes, and constraints and converts them into a schema file.
You can also open a SQL file in the workspace and use Convert to SetFN schema. Both paths use the same conversion rules.
3. Build it directly in the interface
Add tables and columns one at a time in the grid editor.
Add a table
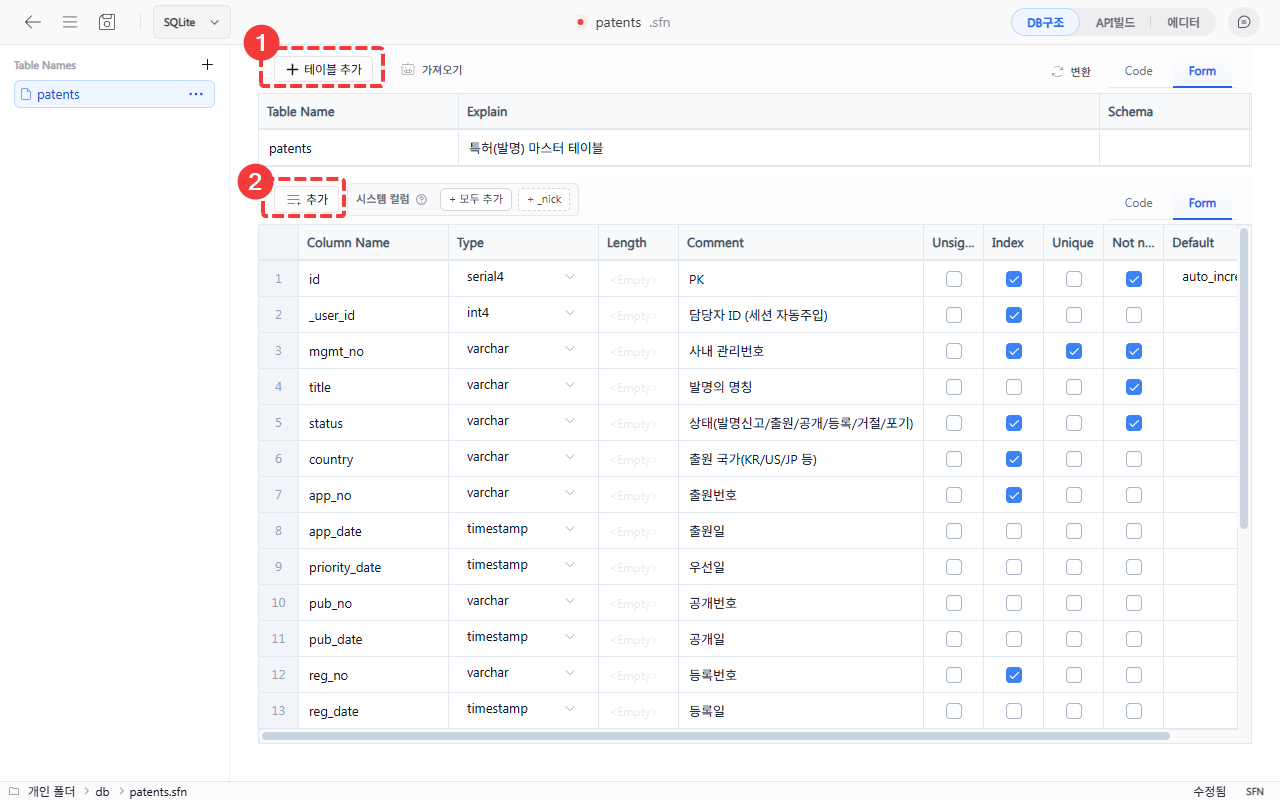
Select + Add table at the top of the main screen and enter the table information.
| Item | Description |
|---|---|
| Table Name | Table name also used in API addresses, such as user_profile |
| Explain | A description users can understand |
| Schema | Database schema name, such as public |
Add columns
Select + Add to add a row to the column list. Each row represents one column.
| Item | Description | Example |
|---|---|---|
| Column Name | Column name | user_id, email |
| Type | Data type | varchar, int, bool |
| Length | Data length | 255 |
| Comment | Column description | User name |
| Default | Default value | auto_increment, NULL |
| Unsigned | Whether only positive values are allowed | - |
| Index | Whether to create an index | - |
| Unique | Whether values must be unique | - |
| Not null | Whether a value is required | - |
Use System columns to add commonly used fields such as _user_id, _nick, and _created_at for recording users and creation times.
Copy or delete a column
Right-click a column to open its context menu.
- Copy and add: Adds a copy of the selected column below it with the same properties.
- Delete: Deletes the selected column.
4. Edit as JSON
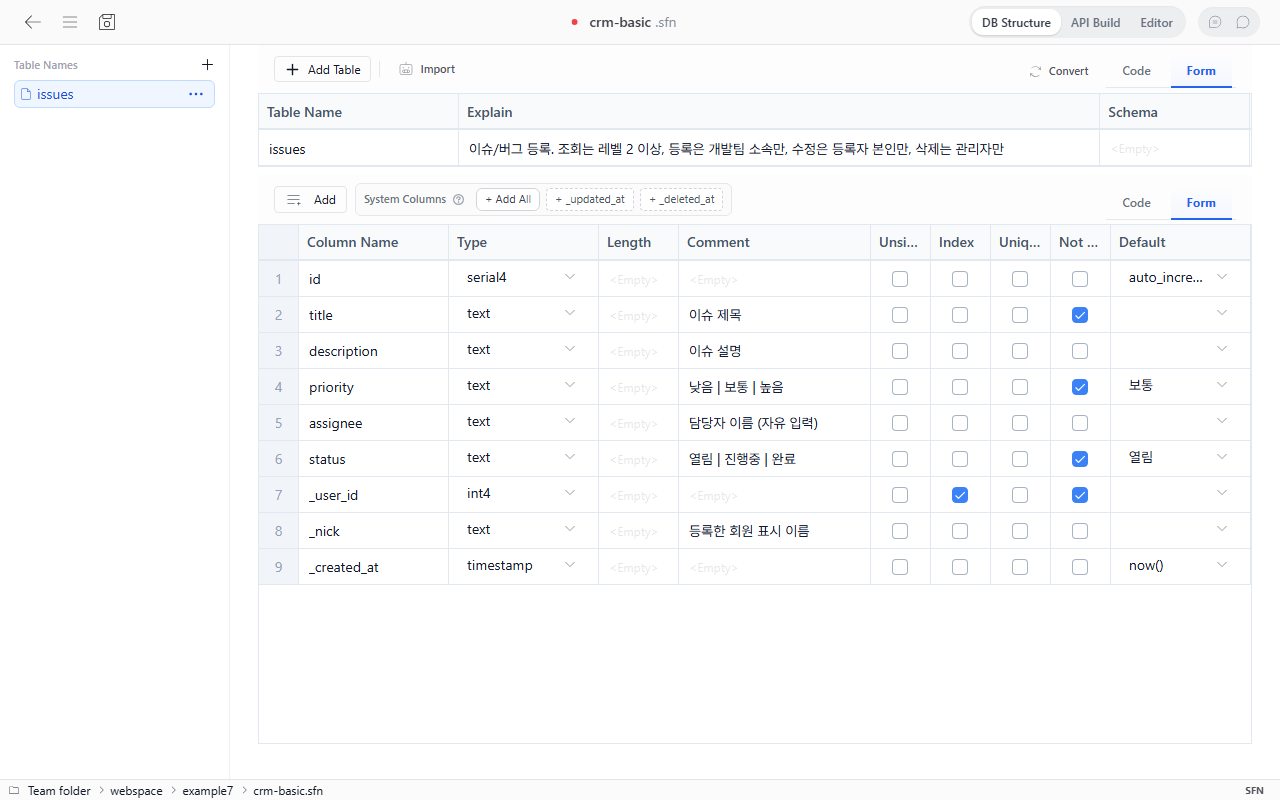
Select Editor at the upper right to edit the complete structure as JSON. The JSON and grid editors use the same content, so you can switch between them.
{
  "content-type": "application/setfn-schema",
  "dbType": "sqlite3",
  "data": [
    {
      "table": { "name": "user_profile", "schema": "public" },
      "columns": [
        {
          "name": "email",
          "type": "varchar",
          "len": 255,
          "unique": true,
          "notnull": true
        }
      ],
      "label": "User profile"
    }
  ]
}
dbType provides compatibility with existing files; it does not select the runtime engine. Choose the final engine and connection information in the storage step of API Build.
API permissions matter as much as data
For each API, configure sign-in requirements, minimum level, administrator access, team access, and whether a user may access only records they created.
- Do not use public access for lists containing personal information.
- Specify an owner column for user-specific data.
- Start update and delete permissions more narrowly than read permissions.
- Check that the permission summary shows every intended condition.
After saving
Save the schema with the button at the upper left or Ctrl+S. Then open API Build, review endpoints and permissions, and deploy it as a database.
After deployment, create one small record. When the new structure appears in an API response, the schema file has become a working service rather than just a document.
Good to know
- Use only lowercase English letters, numbers, and underscores (
_) in table and column names. - For many columns, use JSON editing or SQL import.
- Depending on administrator policy, overwriting a schema with existing data may be prohibited or restricted to administrators and deployment operators.
Next step
Continue with Build APIs and deploy a database to select the storage engine, review endpoints, and run your first API.