'/%3e%3cpath%20id='cross_2'%20data-name='cross%202'%20class='cls-2'%20d='M20.612,30.43h0a5.361,5.361,0,1,0-10.723,0H0A33.709,33.709,0,0,1,30.569,0V9.75a5.361,5.361,0,1,1,0,10.723V30.43Z'%20transform='translate(67.193%200.007)%20rotate(90)'/%3e%3cpath%20id='cross_3'%20data-name='cross%203'%20class='cls-3'%20d='M20.612,30.43h0a5.361,5.361,0,1,0-10.723,0H0A33.709,33.709,0,0,1,30.569,0V9.75a5.361,5.361,0,1,1,0,10.723V30.43Z'%20transform='translate(67.186%2067.041)%20rotate(180)'/%3e%3cpath%20id='cross_4'%20data-name='cross%204'%20class='cls-4'%20d='M20.6,30.5h0a5.361,5.361,0,1,0-10.723,0H0A33.71,33.71,0,0,1,30.56,0V9.818a5.361,5.361,0,1,1,0,10.723V30.5Z'%20transform='translate(0%2067.041)%20rotate(-90)'/%3e%3c/svg%3e)
Creating, Editing, and Deleting Events
In the Calendar plugin, you can create new events and edit or delete events you've registered. You can specify a title, date, time, attendees, recurrence, and even attach related files to an event.
Creating a New Event
Click the New Event button in the upper right, or click an empty time slot or date on the calendar.
- Clicking the New Event button
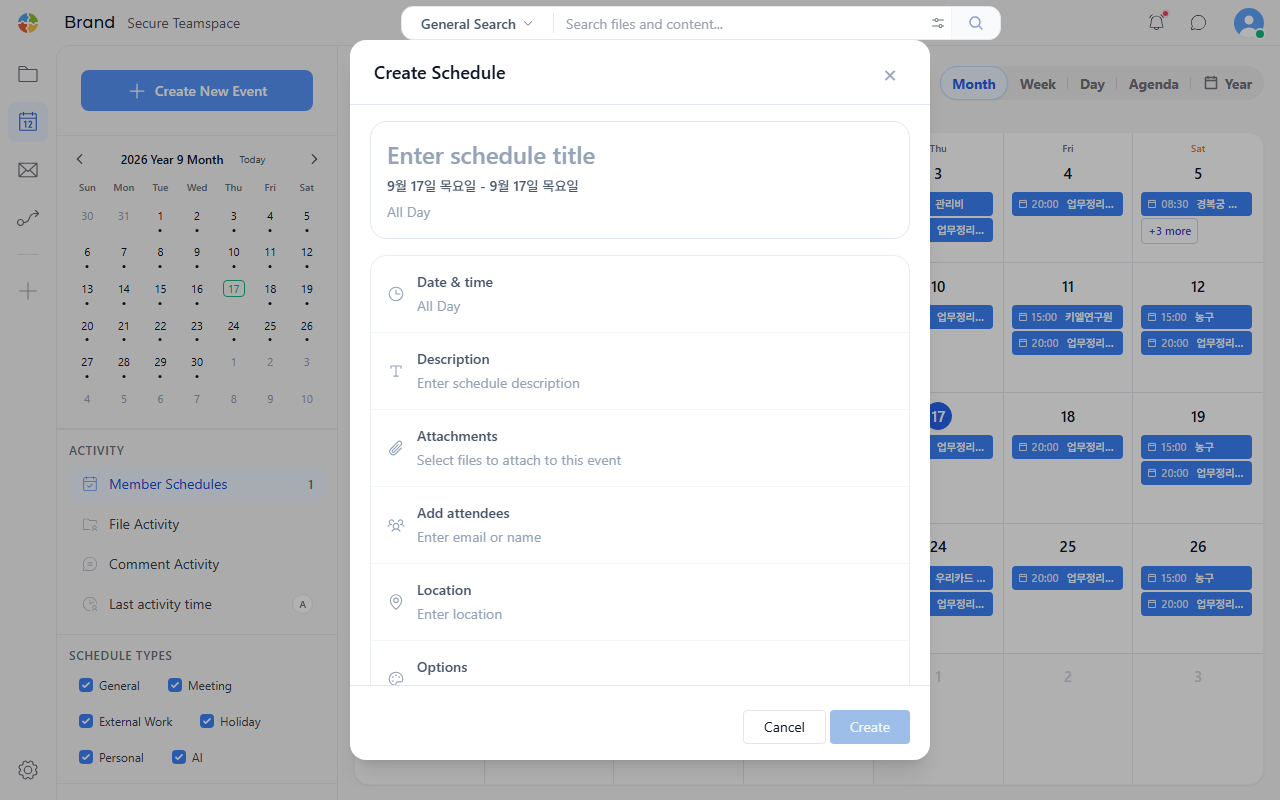
- Clicking an empty time slot on the calendar main screen
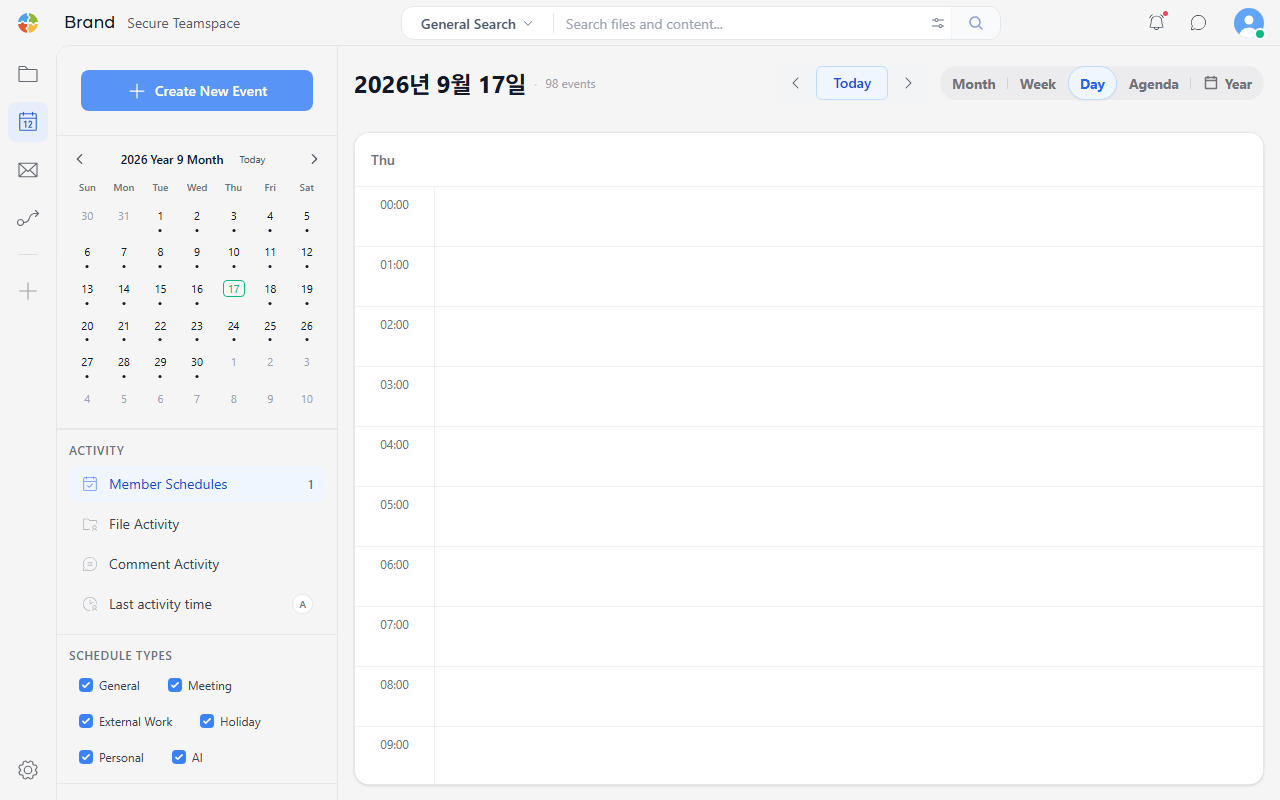
Entering Basic Information
On the event creation screen, enter the following fields.
- Title: Enter the name of the event
- Date: Choose a start date and end date
- Time: Specify a start time and end time. For an all-day event, select the "All day" option
Adding Attendees
In the attendees field, search for a team member's name or ID to add them. You can add multiple attendees at once.
Recurrence Settings
If the event repeats, set the recurrence pattern. You can specify daily, weekly, monthly, or yearly.
Save
After entering all fields, click the "Save" button to create the event. A notification is sent to any team members designated as attendees.
Viewing, Editing, and Deleting Events
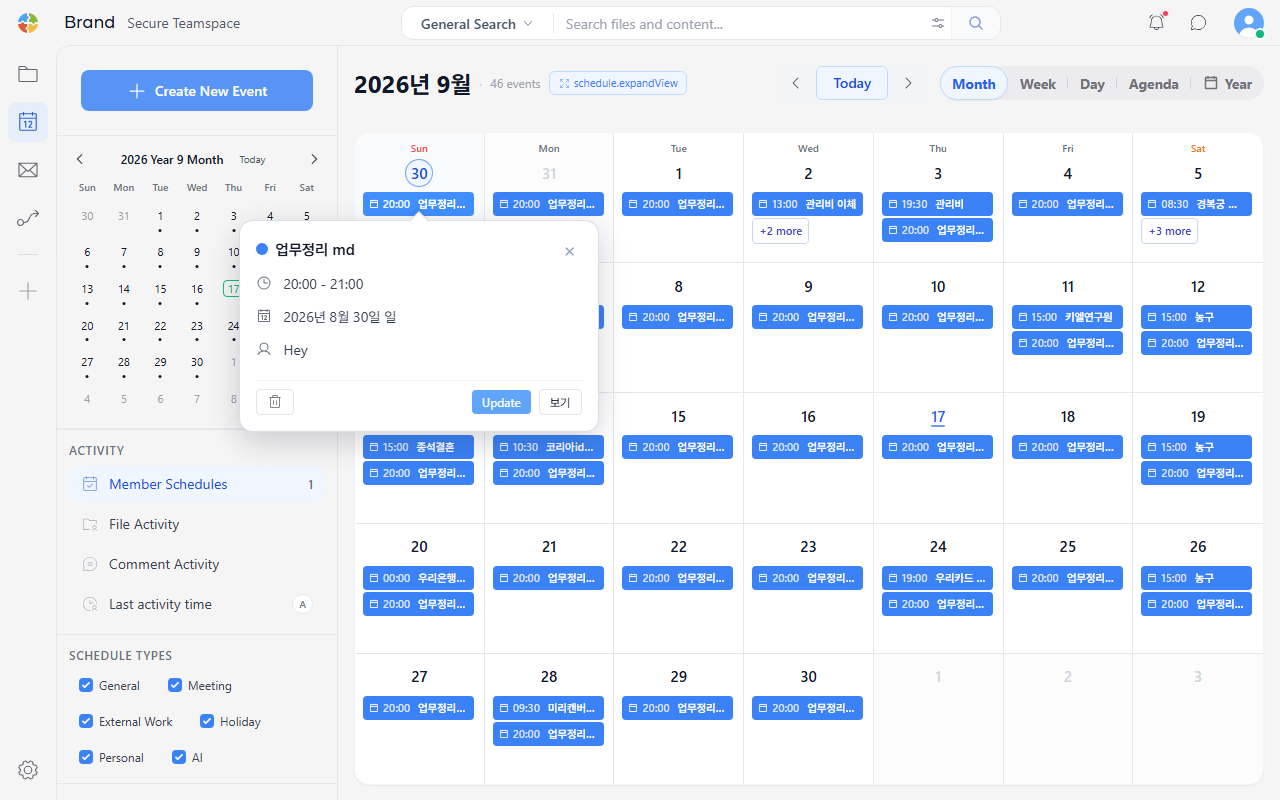
Click an event on the calendar screen to open a detail popup. You can check the title, time, date, attendees, and other information. On the left of the popup is a 🗑️ delete icon, and on the right are "Edit" and "View" buttons.
Viewing Event Details
Clicking the "View" button in the popup opens a screen showing the event's detailed contents.
Clicking "Event Type" or "Participating Members" in the calendar's left panel lets you filter the calendar to show only events of the selected type or participating members.
Editing an Event
Clicking the "Edit" button in the popup opens the same editing screen used for event creation. Edit the title, date, time, attendees, or other fields as needed, then click the "Save" button.
Deleting an Event
Clicking the 🗑️ icon on the left of the popup deletes the event. When the confirmation message appears, select "Delete."